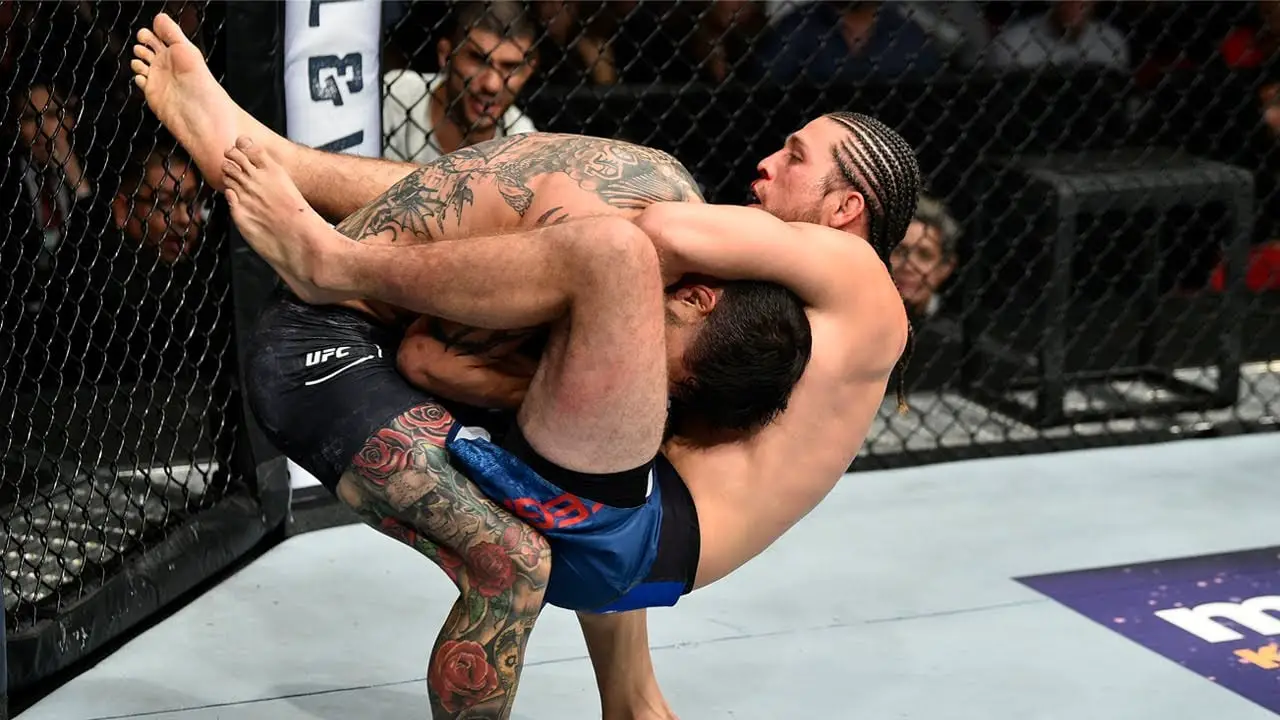
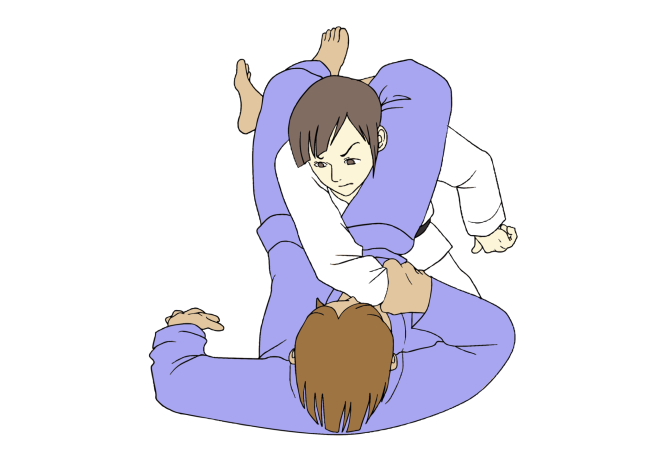
BJJ competition is not just about submissions. It is a mix of control, timing, and smart decisions under pressure. Knowing how scoring works can completely change how one performs during competition.
This article breaks down the standard scoring system used in most competitions. Different organizations like IBJJF and ADCC have small differences, but the core structure stays the same.
How Does Scoring Work in BJJ Competitions?
In BJJ, points are given for positional control, not just submission attempts. You earn by getting into dominant positions and holding them.
Matches can be won in three ways:
Submission (ends the match instantly)
Points (highest score when time runs out)
Referee decision (if everything else is equal)
There is always a timer running. As the match goes on, points add up based on what positions you secure and control.
Hey everyone, Cameron here from Grapplers Graveyard!
I wanted to share my real experience using the Ladder Fitness app, because this isn’t a review I planned to write, it’s one that happened organically. Like a lot of people, I first came across Ladder through a TikTok ad. Normally I scroll past those, but curiosity got the best of me. I downloaded the app, started the 7-day free trial, and figured I’d give it a fair shot.
What immediately stood out was how much structure and time-saving value the app gave me. Within the first week, I realized I wasn’t wasting time guessing workouts, second-guessing programming, or hopping between routines.
Everything was laid out clearly, progress was tracked automatically, and the coaching felt intentional. By the end of the trial, it was obvious this was something I’d stick with long term — and now, eight months later, I’m still using it consistently.
In this review, I’ll break down:
Why I chose the Ladder Fitness app as my go-to gym programming
Why I think it’s especially useful for grapplers and busy professionals
A straightforward overview of my experience using the app and training under different coaches
If you’re short on time, train hard, and want a system that actually removes friction from working out, this breakdown should help you decide if Ladder is worth trying for yourself.
Why I Decided to Try the Ladder Fitness App
Outside of pure curiosity, the real reason I gave the Ladder Fitness app a shot was because I’d been struggling with something for a long time: consistent, structured workouts that actually felt like progress.
As an online business owner, a working professional, someone in a relationship, and someone who still wants a life outside of work, fitting in quality training isn’t always easy. For years, I’ve lifted weights and trained Brazilian Jiu-Jitsu, but if I’m being honest, my weight training always took a back seat to jiu-jitsu. I showed up, I lifted, but there wasn’t much intention or structure behind it.
Lately, that shifted. I started feeling more drawn to lifting consistently and spending more time in the gym — and that’s when the lack of structure really became obvious. I was training more, but I wasn’t following a plan. No clear progression, no real system, just workouts that felt fine but weren’t moving the needle.
So when I saw Ladder pop up in a TikTok ad, it actually caught my attention. It felt targeted — in a good way. I figured I’d try the free trial and see if it could solve the exact problem I was dealing with.
Choose the Exercise Style You Want
What immediately stood out is how flexible and customizable the app is. Ladder lets you choose:
Your ideal workout time
The style of training you actually want to do
Create Preferences if you are busy
Whether that’s:
Cardio-focused training
Pilates or strength training (especially great options for women)
Bodybuilding-style workouts for muscle and strength
There’s a trainer and program for pretty much every goal and schedule. Instead of forcing you into a one-size-fits-all routine, Ladder adapts to how you want to train. That level of structure combined with flexibility was exactly what I was missing — and it’s what made me stick with the app long-term.
My Training Background Before Ladder
Before using Ladder, my training was heavily centered around Brazilian Jiu-Jitsu, with weight training playing more of a supporting role than a primary focus. I’ve spent years on the mats, consistently training and prioritizing grappling, while my gym sessions were often unstructured and secondary.
I lifted regularly, but without a clear progression or long-term plan, which meant my strength training lagged behind my overall athletic goals. As my priorities started to shift toward building strength and training more consistently in the gym, that lack of structure became impossible to ignore.
The Problem I Was Trying to Solve
The main problem I was trying to solve was consistency and progression in the gym without adding more mental load to an already busy life.
Between running online businesses, working full-time, maintaining a relationship, and still training jiu-jitsu, I didn’t want to spend extra time programming workouts or guessing whether what I was doing was actually moving me forward.
I needed structure, clear progression, and time-efficient workouts that fit into real life—not another system that required more planning than the training itself.
What the Ladder Fitness App Actually Is (Quick Overview)
The Ladder Fitness app is a structure-first workout app that gives you guided training plans created by certified coaches and tailored to your goals — whether that’s strength, conditioning, fat loss, or general fitness.
Instead of random workouts or guesswork, Ladder provides a step-by-step training program you follow on your schedule, with built-in progression, tracking, and personalization.
It’s designed for people who want a clear training roadmap without spending time planning routines, making it ideal for busy professionals, athletes, or anyone who wants results without the guesswork.
How Ladder Works
Ladder works by pairing you with a real coach and a structured training plan that updates weekly based on your goals, schedule, and performance. When you sign up, you choose what you want to focus on (strength, conditioning, hypertrophy, Pilates, etc.), how many days per week you can train, and how long your workouts need to be. From there, Ladder assigns you to a coach and program that fits those preferences.
you always have the option to change your trainer at any given moment. I’ve gone through five at this point before. I stuck with Corey from Team Forged! In short: Ladder removes decision fatigue, saves time, and gives you a proven structure—so you can focus on showing up, training hard, and getting results.
Who Ladder Is Built For
Ladder isn’t trying to be everything for everyone and that’s actually one of its biggest strengths. It’s built for a very specific type of person who wants results without overthinking their training.
Ladder is a great fit if you are:
A busy professional who wants effective workouts without spending time planning, guessing, or wandering the gym.
Someone who craves structure and consistency, but still wants flexibility around workout length, training days, and goals.
An athlete or active person (including grapplers) who wants strength training to support their sport—not compete with the rest of their life.
Anyone tired of random workouts and looking for a clear progression plan that actually makes you stronger over time.
Ladder may not be for you if:
You already love writing your own programs and enjoy experimenting without guidance.
You want purely unstructured, “do whatever you feel like today” workouts.
You’re only looking for free content and aren’t ready to commit to a consistent training routine.
You expect 2-hour gym sessions with zero regard for time efficiency.
At the end of the day, Ladder works best for people who value clarity, efficiency, and long-term progress. If that sounds like you, this app makes training feel simple again—in the best way possible.
My Real Experience After 8 Months of Using Ladder
Overall, my experience with Ladder after eight months has been genuinely positive. From starting on the free trial to committing to the annual membership, I haven’t run into anything that made me question using the app long term. It’s done exactly what I hoped it would do: remove friction from training and make strength work feel simple, structured, and sustainable.
While I don’t use every feature religiously (like nutrition or water tracking), that’s more about personal preference than a flaw in the app. I already have my hydration and meal prep dialed in, and Ladder lets me focus on what I actually need it for—showing up and training consistently.
How Often I Actually Trained
Realistically, I train with Ladder about 2–3 times per week. That’s intentional. I set a goal this year to complete 104 Ladder workouts, which averages out to two per week. As someone who’s juggling work, relationships, and other priorities, that felt realistic and achievable.
I’ve also tried four or five different trainers inside the app, and switching between programs has been seamless. Whether I wanted more strength-focused work or something slightly different week to week, the transition never felt disruptive or confusing.
How Ladder Fits Into a Busy Schedule
My days are full. I’m up early, working a demanding job that involves talking to clients and customers all day, and by the time work is done, mental energy is usually pretty low.
This is where Ladder really shines for me. After work, I can head straight to the gym knowing my workout is already planned. No thinking. No wandering. No debating what I should be doing. I just open the app, hit start, and get to work.
Could I wake up earlier and train? Sure. But I value my sleep—and Ladder makes training after work feel efficient instead of draining.
What Kept Me Coming Back
What ultimately kept me consistent was how easy Ladder makes showing up. I wanted a system where the only responsibility I had was to give my best effort once I walked into the gym. Ladder does exactly that.
It removes decision fatigue, respects your time, and gives you structure without being rigid. For me, that autonomy—combined with real progression—has been the difference between wanting to train and actually doing it week after week.
Pros & Cons of the Ladder Fitness App
Pros
Clear structure with real progression
Saves a ton of time
Perfect for busy professionals
Flexible programming
Great for grapplers looking to balance lifting with other training
Easy to stay consistent even at just 2–3 workouts per week
Minimal mental effort
Cons
Not ideal if you hate structured programs or want total freedom every session
Nutrition and hydration tracking may feel unnecessary
Better suited for consistency than max-intensity daily training
Subscription-based (not a one-time purchase)
I have a 30-day guest pass. Click below if you want to try and test out the app for 30 days.
Ladder has been a complete game changer for our daily gym routine while mixing it in with Brazilian Jiu Jitsu. If you are a busy professional or someone that is looking for structure in the gym, Ladder is amazing. Join Ladder today and get 30 days for free using my referral code!
We earn a commission if you make a purchase, at no additional cost to you.
Is the Ladder Fitness App Worth It?
Yes if you’re a busy professional or grappler who wants structured, time-efficient workouts without overthinking your training, the Ladder Fitness app is absolutely worth it. It delivers real progression, saves mental energy, and makes staying consistent in the gym far easier than trying to program everything yourself.
Buying your first BJJ gi can feel confusing fast.
Between sizing charts, weave types, GSM meaning and importance, and all the brand opinions people have, most white belts either overspend or end up with a gi that doesn’t fit, shrinks badly after a couple of washes, or feels horrible on their body after a few rounds.
This guide is built specifically for white belts purchasing their first, second, or third Brazilian Jiu-Jitsu gi. We want to help you find something that fits well, lasts, stays competition-legal, and most importantly, doesn’t waste your money. There are a lot of options to choose from and they will constantly be changing.
Every recommendation below is based on real training, repeated washing, and hands-on testing so you dont have go through the pain of wasting money on something that you cannot return after use.
For most beginners, gis in the $100–$150 range are going to be the sweet spot and that is wear we will be focusing our recommendations for this guide.
Best BJJ Gi for Beginners (Top Picks)
These are the gis we recommend most often to new practitioners based on value, durability, comfort, and ease of ownership.
Best Overall Beginner BJJ Gi
Gold BJJ – Comp380 GSM or Foundation Gi
If you want one gi that does almost everything well, this is it. Gold BJJ one of the highest rated Gi companies that makes it on multiple of our lists. Gold a foundation, competition and lightweight BJJ gi to service just about every area there is in this space.
For the price you pay on the gear itself you’ll get exceptional value and longevity out of all the products they have to offer.
The Gold BJJ Competition gi consistently stands out for beginners because it balances weight, durability, and comfort better than most gis in its price range.
Why it’s great for white belts:
Midweight pearl weave (durable but not bulky)
Comfortable cut for most body types
Minimal shrinkage when washed correctly (almost none in mine over years of use)
The Gold BJJ AeroWeave is not our top competition recommendation, but it’s one of the best everyday training gis for white belts who prioritize comfort and breathability. Personally, we recommend this gi to just about all of our teammates when they come to us asking for recommendations of Gi’s to check out.
This BJJ gi is our everyday trainer along side some Origin BJJ Gi’s that we own.
Why we love like it:
Extremely lightweight and breathable
Comfortable during long sessions
Affordable for a second or third gi
Easy to pack and wash
Important note: While it’s great for training, we wouldn’t recommend this gi as your primary competition option due to its lighter construction. Technically, if you are competing in a IBJJF tournament and they weigh your gi, this will not be competition legal.
Best as a training-first gi, not a competition-focused one.
This is our go to daily training gi. Overall it has lasted us a very long time, is extremely light and offers at a very affordable price compared to other gi's on the market
Sanabul consistently offers some of the best entry-level value in BJJ.
Their gis are affordable, widely available, and durable enough for beginners training multiple times per week. We have tried three separate options from Sanabul and we pleasantly surprised with the overall quality of the products that we got. They do not make it in our rotation as much these days but early in our BJJ journey they were awesome gis to roll in.
Why Sanabul works for beginners:
Reasonable pricing across all models
Solid stitching and construction
Comfortable cuts
Many IBJJF-safe options
Easy to replace or rotate
Sanabul gis won’t feel premium, but they’re reliable — and that’s exactly what most white belts need.
Best for beginners who want dependable gear without overthinking it.
We earn a commission if you make a purchase, at no additional cost to you.
These are best for brand-new white belts who aren’t sure how long they’ll stick with the sport.
What Size Gi Should a Beginner Buy?
Most beginners should start with standard sizing (A0–A5) and avoid guessing. Most of the time BJJ gi companies will have size charts readily available for you to choose from. Just match up your height and weight and it should give you the ideal size for your body type.
General tips:
Follow the brand’s official size chart
Expect some shrinkage, even on pre-shrunk gis
If between sizes, size up and shrink slightly
Avoid buying too tight. Gis almost always shrink more than you expect and when they are too tight they suck to roll in. Its the easist way to feel like your restrictive on movement, that the gear rips, and could make you feel like you are overheating during long rolling sessions.
Beginner Gi Weight Recommendation
For white belts, weight not matter initially when you are buying a product but as you start rolling and consistently training it matters way more than you would think.
Personally, I hate rolling in anything heavier that 380 GSM. It feels heavy, makes me overheat, and just makes my rolls less enjoyable. Call me a snob I dont are but I like what I like!!
Best choice:
Middleweight (180 GSM to 380 GSM) pearl weave
Why?
Durable range of products that lasts through constant gripping and pulling
Comfortable for long classes
Legal for competition
Easier to maintain than heavy gis
Lightweight gis are fine for training, but shouldn’t be your only gi early on.
Common Beginner Mistakes (Avoid These)
Buying a gi that’s too heavy
Ignoring shrinkage
Overspending before knowing preferences
Choosing style over function
Buying a non-competition-safe gi unintentionally
Final Recommendation for Beginners
If you’re a white belt buying your first gi:
Start in the $100–$150 range
Choose middleweight pearl weave
Prioritize fit, comfort, and durability
Stick with brands that have proven reliability
If you want a broader breakdown across all experience levels, see our full Best BJJ Gi guide. This where we rank and score every gi we test using the Graveyard Scale. That list is constantly being updated and changed as we buy and review more gear.
Balancing the grind of combat sports training with the demands of personal life and a professional career is no small feat. We do it and many others are out there living the same truth as us.
Whether it’s finding time to recover, managing energy throughout the week, or maintaining relationships outside the gym, the challenge is something every dedicated athlete faces sooner or later. Personally, I would LOVE to spend more time lifting, training and maybe even diving more into different practices, but the season of life I currently find myself in has me only doing this a couple of times a week.
I knew that if I was facing this challenge, I wasn’t alone; others have likely felt the same way.
To uncover practical solutions, we asked professionals from different walks of life how they’ve managed to keep training consistently while handling the pressures of work and home. Their answers highlight six simple but powerful strategies that anyone can apply to stay sharp in the gym without sacrificing success outside of it.
Batch High-Energy Work to Master Work-Life Balance
Danielle Swimm, Consultant, at Entrepreneurial Therapist, had this to say when asked how she balances training and running not one but two businesses. “I’ve been balancing motherhood, running two businesses (a therapy practice and business coaching company), and maintaining my wellbeing since 2018, so I totally understand the juggle. The strategy that saved my sanity was **batching my high-energy work into concentrated blocks**. I schedule all my therapy sessions back-to-back from 11 AM to 4 PM, then I’m completely OFF. This means I can be fully present during intense work periods, then switch gears completely for family time with my daughter. No scattered appointments throughout the day that fragment my energy. The real breakthrough came when I realized trying to do everything perfectly was burning me out faster than anything else. I started scheduling my work around my natural energy peaks (afternoons for client work, mornings for business tasks) and built in non-negotiable boundaries. I finish work at 4 PM every weekday–period. During my first year building the practice as a single mom, I had to get ruthless about what I’d let go of. I asked for help with household tasks, said no to social commitments that drained me, and treated my business like the “baby” it was–giving it focused attention during designated times, then putting it to bed so I could live my life.”
Boxing Transforms Stress into Professional Strength
One powerful perspective comes from a professional who found that training wasn’t just about fitness; it became a tool for managing stress and sharpening performance at work. Rather than trying to “make time” for the gym, he reframed boxing as the key to staying balanced in both his career and his family life. I’ve been boxing for years while running multiple practices across Canada and the US, and the secret isn’t about finding more time–it’s about using combat sports as your stress relief valve. When I was running my family practice in Cochrane for nine years, the physical and mental demands were brutal. Boxing became my reset button between patient overload days. I’d hit the gym right after closing the clinic, and those 45 minutes of heavy bag work would completely clear my head from dealing with insurance companies and difficult cases. The physical exhaustion actually helped me sleep better, which meant I showed up sharper the next day. The real breakthrough was realizing that the discipline from boxing directly improved my patient care. Learning to stay calm under pressure in the ring translated to staying composed during complex spinal adjustments. My hand coordination got better, my focus improved, and I could work longer hours without mental fatigue. My specific recommendation: use your training session as the bridge between work stress and family time. I’d go straight from the clinic to boxing, then come home completely present for my three kids instead of bringing work anxiety to the dinner table.” Gannon Ward, CEO, Atmosphere Chiropractic and Wellness
Schedule Combat Training Like Business Meetings
Another take that really stuck out was around structure. So many people struggle with building it not just in combat sports, but in life in general. Once school ends after 18, that built-in routine disappears, and if you don’t create structure for yourself, it’s easy to slip into a whirlwind of chaos. Here is what Joseph Depena, Owner of VP Fitness, had to say about creating structures that serve you: I’ve been balancing boxing training with running VP Fitness since 2011, so I get this struggle completely. The biggest game-changer for me was treating my training like any other business meeting–scheduling it and protecting that time religiously. My most effective strategy is what I call “movement integration throughout the day.” Instead of trying to carve out huge blocks for training, I built boxing fundamentals into my workday. I’d do shadowboxing between client sessions, practice footwork while reviewing franchise documents, and even hold walking meetings with my team. The key breakthrough came when I realized combat sports training actually improved my business performance rather than competing with it. After implementing structured boxing sessions at VP Fitness, I noticed my decision-making got sharper and my stress management improved dramatically. My energy levels stayed consistent even during 12-hour days managing franchise operations. Start with just 20-30 minutes of training scheduled like a client appointment. I blocked out 6:30-7:00 AM for boxing three days a week, and it became non-negotiable. Once that habit stuck, everything else fell into place because the mental discipline from combat sports carried over into better time management across all areas of life.
Energy Management Trumps Time in Sport-Career Balance
Max Shak, Founder & CEO of Zapiy had a take that really stood out to us. What stood out here was the idea that balance isn’t just about finding more hours in the day it’s about managing your energy. Too many people try to separate their training from their work, when in reality, the two bleed into each other. Once you line things up with your natural energy levels and actually respect recovery, training stops feeling like it competes with your career and starts fueling it.
Here is what he had to say: “Balancing combat sports training with building a company has been one of the most challenging but rewarding balancing acts of my life. When I first got serious about training, I underestimated how much it would demand of me—not just physically, but mentally. Running a business already requires long hours and constant decision-making, so adding intense sparring sessions and conditioning into the mix sometimes felt impossible. Early on, I made the mistake of compartmentalizing the two: business during the day, training at night. What I quickly realized was that one would inevitably spill into the other. If I had a rough training session, I’d carry that frustration into my work the next morning. If I pulled a late night with clients, my training the following day would suffer. The turning point came when I stopped treating training and work as separate worlds, and instead began integrating them into a single rhythm. One strategy that really worked for me—and I’d recommend to anyone trying to balance passions with professional life—was structuring my schedule around energy, not time. I discovered that my mind is sharpest in the morning, so I reserved those hours for deep work on the business. Training, which gave me a mental reset, was best placed in the afternoons when my decision-making energy was lower. This small shift changed everything: instead of fighting for balance, the two pursuits started complementing each other. Combat sports also taught me a surprising lesson that spilled over into entrepreneurship: the value of recovery. At first, I equated rest with weakness, both on the mat and in the office. But overtraining and overworking eventually caught up to me. Learning to intentionally schedule recovery—whether that meant taking a rest day from sparring or stepping back from work for a few hours—actually made me sharper and more effective in both areas. Looking back, the balance came from a mindset more than logistics. Once I stopped seeing my training as something that competed with my career and instead treated it as a discipline that fueled my resilience as a leader, it became easier to sustain both. If I had to give one piece of advice, it’s this: don’t chase perfect balance—find harmony by aligning your schedule with your natural energy and by respecting recovery as much as the grind.”
Treat Boxing as Medicine, Not Hobby
I really liked this perspective because it flips the script. Boxing and your combat sports practice isn’t just a hobby to squeeze in when there’s time; it’s medicine. When you treat training as something essential, like a doctor’s appointment you can’t miss, it stops feeling like it takes away from life and instead becomes the thing that makes everything else run smoother.
I like boxing and it needs a lot of time. But the truth is when I do not do it, I feel like my life misses something essential. The physical exhaustion from training actually gives me more energy for work than any amount of rest ever could. The strategy that actually works (at least for me) is treating training like a non-negotiable doctor appointment rather than a hobby. I schedule my work around boxing, not the other way around. All in all, boxing is not taking time away from my life. Rather it is the thing that makes everything else function properly. Burak Özdemir, Founder, Online Alarm Kur
Protect Training Time to Build Career Discipline
This last one drives home a simple but powerful point: consistency comes from protecting your training time. By locking it into the calendar and treating it as non-negotiable, the discipline built on the mat carries over into work, studies, and everything else.
When Agus Hendra Saputra, Sports Content Writer, at OddsSurfer, was competing in Brazilian Jiu-Jitsu as a blue belt, the biggest challenge was balancing training with studies and work. What really helped me was treating training like a non-negotiable appointment in my calendar, once it was scheduled, I showed up no matter how busy the day was. That consistency built the discipline I still rely on today in sports analytics: planning, prioritizing, and being fully present in whatever I’m doing. My advice is simple, schedule your passion and protect that time. Far from being a distraction, it will actually make you more effective in everything else.
How Training Combat Sports Makes Everyday Life Better
Combat sports might look intense from the outside but for those who train, they’re often the most grounding part of the day.
Whether it’s Jiu-Jitsu, boxing, or Taekwondo, the discipline and clarity that come from consistent training often spill into everyday life in surprising ways. In my own life, I have done a complete 180 and have been shocked at how Brazilian Jiu-Jitsu has changed my mind and body.
We’re not just talking about physical fitness; we’re talking about better decision-making, stress management, and sharper focus at work and at home.
To explore this deeper, I reached out to five experts and practitioners from around the world who shared how combat sports have impacted their lives beyond the gym. Their stories touch on everything from leadership and mental toughness to emotional resilience and personal growth. If you’ve ever wondered whether combat sports have something real to offer your daily life, this might be the sign you were looking for. Here is what 5 thought leaders had to say.
Boxing Strategies Transform Business Leadership and Decision-Making
One of the most underrated benefits of training combat sports is how it sharpens your ability to think strategically under pressure. This is a skill that translates directly into professional and entrepreneurial success. You’d be surprised how much sparring and business have in common… both demand quick thinking, composure, and the ability to adapt on the fly. Robby, head coach at Legends Boxing, summed it up perfectly: “I’ve been head coaching at Legends Boxing for over two years and compete in amateur boxing myself – the strategic thinking required in the ring has completely transformed how I approach business decisions and team management. Boxing taught me to read situations and adapt instantly, which became crucial when I led our gym through a 45% membership increase in 18 months. In the ring, you have seconds to recognize your opponent’s patterns and adjust your strategy – I apply this same rapid assessment to analyzing sales metrics and pivoting our approach when conversion rates drop. The mental preparation aspect is massive. Every night I mentally rehearse what I’ll do in the ring, visualizing scenarios and responses. I started applying this same technique to coaching meetings and business presentations, mentally walking through difficult conversations with underperforming team members before they happen. What surprised me most was how boxing’s requirement to stay calm under physical pressure made high-stress business situations feel manageable by comparison. When I’m developing curriculum for coaches nationwide or handling revenue problems across multiple gym partnerships, my baseline stress tolerance is just naturally higher because I’m used to functioning effectively while someone’s trying to punch me.” National Head Coach, Legends Boxing
Combat Training Builds Executive Calm Under Pressure
At Grapplers Graveyard, we’ve always believed that staying calm under pressure is a skill, and like any skill, it must be practiced consistently to unlock its full potential. The more often you train under stress, the more natural that calm demeanor becomes when it matters most.
Look at how Dragutin has used BJJ as a tool for his everyday life: “Training in combat sports has sharpened my ability to stay calm under pressure — a skill that directly translates into running a business. Sparring teaches you to process stress in real time, adapt strategies mid-round, and keep a clear head when things don’t go as planned. It’s also taught me the discipline of consistent improvement: in both the gym and the boardroom, you can’t just rely on talent; you need structured practice, feedback, and resilience to push through setbacks. Dragutin Vidic Founder & CEO, Theosis App
BJJ Provides Stress Relief for Remote Tech Executive
Eugene runs a data analytics consultancy and holds a purple belt in Brazilian Jiu-Jitsu. For him, BJJ has been more than just a sport, it’s helped him thrive in high-pressure environments and serves as a go-to way to decompress from the demands of daily life. “BJJ helps me tremendously to cope with work-related stress. Once I started training 3-4 times per week, I really felt the difference. After I train, I feel like my mind goes quiet and I no longer think about the work-related problems. I feel like BJJ helps me to switch off and just enjoy my time off work. I also love my BJJ training because it is a chance for me to socialise. All my team is remote and based in several different countries. As a result, I spend my work days alone, sitting in front of my laptop. It is nice to go training at the end of the day and socialise with people face-to-face. Finally, when I don’t train my body just starts aching. This distracts me from my work throughout the day and just makes me less happy. I do get injured regularly, though, but I would say that overall BJJ is a net positive for me!” Eugene, Managing Director at Vidi Corp LTD
A lot of people get into combat sports for the physical benefits or because they hear about it from friends (or Joe Rogan like myself. People hear about how the workout and challenge of BJJ is the part that really reeled them in but over time, you start to notice that it’s doing something bigger.
Combat sports sharpen your mind, help you handle stress, and build discipline that carries into other parts of life. One black belt I spoke to, who’s made BJJ a consistent part of his routine, summed it up perfectly: “Having been into fitness religiously for years now, I’ve tried to incorporate multiple forms of training, including Brazilian Jiu-Jitsu, for years in my weekly routine. I’ve even earned a black belt in BJJ. I find that combat training provides a high-intensity, full-body workout, improving cardiovascular endurance, muscle strength, flexibility, balance, coordination, and agility. Most importantly, I find this training functional and effective for daily movements and flexibility. Combat sports also require more focus, which releases more endorphins and helps you deal with stress greatly. BJJ sessions act as anchors for my week, keeping me grounded, calm, and focused. Focusing on aspects often ignored in daily life, such as positioning, tactics, reaction times, etc., makes me feel energized and motivated. The wide variety of techniques also demands more self-discipline and persistence, which builds physical and mental toughness, endurance, and consistency that translate into all personal and professional endeavors. The greatly improved cardiovascular health, fitness, and stress reduction improve cognitive function significantly. The focus on anticipating your opponent’s moves and reacting to things with calm and calculation improves your mental clarity and decision-making skills throughout life. Furthermore, partner drills, mentorship, and community classes, staples of combat sport training, build collaboration within an ethics-oriented environment.” Shailen Vandeyar, Cycling Coach & CEO, Biking Bro
CEO Finds Youth and Balance Through Taekwondo
Not everyone picks up a combat sport in their 20s or their 30s or even 40s. For some, the journey starts later, often by accident, and still ends up making a huge impact. One CEO found himself trading boardrooms for the dojang after simply taking his kids to class. What started as a spur-of-the-moment decision turned into something that’s brought balance, stress relief, and even a few bruises: “I am a 57-year-old CEO of a business law firm with nine branches. A few years ago, I took my kids to my friend’s taekwondo dojang because they were being lazy. Rather than just sitting there like the rest of the parents scrolling through their phones, I signed up too. While my kids moved on to other activities, I stuck around. It has been a great stress reliever and so grounding for me. It is also a community that gets my mind off the hectic pace of my work. I am even kind of amused at all the minor injuries I get, like a cracked bone in my foot, I got sparring with that pesky Troy! It makes me feel young, vital, and capable.” Matthew Davis, Business Lawyer & Firm Owner, Davis Business Law
Final Thoughts
From CEOs and coaches to everyday athletes, the message is clear: training in combat sports goes far beyond learning how to throw a punch or secure a submission. It builds discipline, relieves stress, sharpens focus, and creates unexpected community and confidence in the process.
Every person quoted in this piece came from a different walk of life, but they all found something meaningful on the mat, ring, or dojo. If you’ve ever been curious, maybe it’s worth trying a class, see if it clicks. And if it doesn’t? No big deal. Different strokes for different folks. But you might just walk out of your first session with something more valuable than sweat: clarity, calm, or even a new version of yourself.
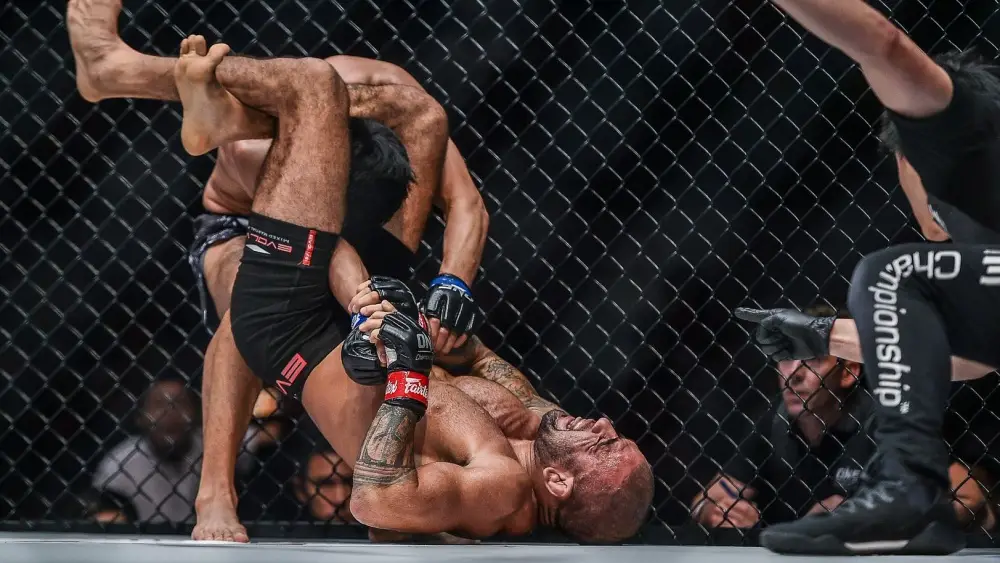
The Guillotine Choke is one of the most famous and effective moves in Brazilian Jiu-Jitsu (BJJ). Named after an old execution device, this chokehold is great for both beginners and advanced fighters. It’s versatile and powerful, making it a key move in both BJJ and Mixed Martial Arts (MMA). In this guide, we’ll explore variations, how to do it, and how to use the Guillotine Choke. You’ll get all the knowledge you need to master this important technique.
Anatomy of the Guillotine Choke
Mechanics of the Choke
The Guillotine Choke works by squeezing the opponent’s neck, targeting the carotid arteries and the windpipe. When done right, the choke cuts off blood flow to the brain, making the opponent pass out if they don’t tap out. The pressure on the windpipe also makes it hard for the opponent to breathe, causing panic and discomfort.
Pressure Points
Knowing the key pressure points is important for doing the Guillotine Choke well. The main targets are the carotid arteries, which are on both sides of the neck. Squeezing these arteries can quickly make the opponent pass out. Pressing on the windpipe can also make it hard for the opponent to breathe, adding to the choke’s power.
Safety Considerations
While the Guillotine Choke is a strong move, it’s important to be safe when practicing and using it. Always make sure your training partners know about the choke and can tap out if they feel uncomfortable. Don’t crank the neck or use too much force, as this can cause injuries. Good technique and control are key to doing the Guillotine Choke safely and effectively.
Variations of the Guillotine Choke
Arm-In Guillotine
The Arm-In Guillotine is a version where the opponent’s arm is trapped along with their neck. This gives you more control and makes it harder for the opponent to escape. To do the Arm-In Guillotine, secure the opponent’s head and arm, then squeeze your arms together and arch your back.
High-Elbow Guillotine
The High-Elbow Guillotine, also called the “Marcelotine” after BJJ legend Marcelo Garcia, involves lifting your elbow high while doing the choke. This increases the pressure on the opponent’s neck and makes it harder for them to defend. To do the High-Elbow Guillotine, secure the opponent’s head, lift your elbow, and pull up and back.
One-Handed Guillotine
The One-Handed Guillotine is a more advanced version that needs precise control and technique. As the name suggests, this choke is done using only one hand to squeeze the opponent’s neck. The free hand can be used to control the opponent’s body or defend against their attempts to escape. To do the One-Handed Guillotine, secure the opponent’s head with one hand, squeeze and arch your back, and use your free hand to maintain control.
10-Finger Guillotine
The 10-Finger Guillotine, also known as the “10-Finger Choke,” involves using both hands to squeeze the opponent’s neck. This version is especially effective when the opponent’s head is low, like during a takedown attempt. To do the 10-Finger Guillotine, interlock your fingers around the opponent’s neck, squeeze your hands together, and arch your back to increase the choke’s power.
When to Use the Guillotine Choke
Against Wrestlers
The Guillotine Choke is very effective against wrestlers, who often go for takedowns with their heads facing the mat. By taking advantage of this position, you can secure the choke and make your opponent tap out before they complete the takedown. The Guillotine Choke is a great counter to aggressive wrestling techniques and can change the course of a match in your favor.
Self-Defense Situations
In self-defense situations, the Guillotine Choke can be a valuable tool for stopping an attacker. Untrained opponents who try to tackle you to the ground often leave their necks exposed, giving you a chance to secure the choke. By applying the Guillotine Choke, you can quickly stop the attacker and create an opportunity to escape or get help.
Common Positions
The Guillotine Choke can be done from various positions, making it a versatile move. Some common positions include:
Closed Guard: The bottom closed guard is a common position for doing the Guillotine Choke. By securing the opponent’s head and squeezing, you can make them tap out from the bottom position.
Mount: From the mount position, you can do the Guillotine Choke by securing the opponent’s head and using your body weight to increase the pressure.
Sprawl: When defending against a takedown, the sprawl position lets you secure the Guillotine Choke and make the opponent tap out before they complete the takedown.
Standing: The Guillotine Choke can also be done from a standing position, making it useful in both BJJ and MMA.
Executing the Guillotine Choke
Step-by-Step Guide
Secure the Head: Start by securing the opponent’s head under your armpit, making sure your forearm is under their neck.
Grip and Control: Use your other hand to grip your wrist, creating a secure hold around the opponent’s neck.
Apply Pressure: Squeeze your arms together and arch your back to apply pressure to the opponent’s neck. Focus on squeezing the carotid arteries and the windpipe.
Maintain Control: Keep your body tight and maintain control of the opponent’s head to stop them from escaping.
Finish the Choke: Keep applying pressure until the opponent taps out or passes out.
Common Mistakes
Incorrect Grip: Not securing a proper grip can make the choke less effective. Make sure your hands are positioned correctly and that you have a firm hold on the opponent’s neck.
Lack of Pressure: Not applying enough pressure can let the opponent escape. Focus on squeezing your arms together and arching your back to maximize the choke’s power.
Poor Control: Losing control of the opponent’s head can lead to escapes. Keep a tight hold and use your body to control their movements.
Tips for Success
Practice Regularly: Consistent practice is key to mastering the Guillotine Choke. Include the choke in your training routine and focus on improving your technique.
Work with Partners: Training with different partners can help you understand the choke better and how to use it against various opponents.
Seek Feedback: Ask experienced fighters and instructors for feedback on your technique. Use their insights to make adjustments and improve your execution.
Defending Against the Guillotine Choke
Recognizing the Setup
The first step in defending against the Guillotine Choke is recognizing the setup. Pay attention to your opponent’s movements and be aware of situations where they might try to secure the choke. Common setups include:
Takedown Attempts: Be careful when going for takedowns, as this is a prime chance for your opponent to apply the Guillotine Choke.
Clinch Positions: In the clinch, watch your opponent’s grip and head position. Avoid leaving your neck exposed and maintain a strong posture.
Effective Counters
Hand Fighting: Use hand fighting techniques to break your opponent’s grip and stop them from securing the choke. Focus on controlling their hands and wrists to disrupt their setup.
Posture and Positioning: Maintain a strong posture and position to make it hard for your opponent to apply the choke. Keep your head up and your neck protected.
Escape Techniques: Learn and practice escape techniques to counter the Guillotine Choke. Common escapes include:
Rolling Escape: Roll to the side and use your body weight to break the opponent’s grip.
Arm Over Escape: Bring your arm over the opponent’s shoulder and use it to create space and break the choke.
Stacking Escape: Stack your opponent by driving your weight forward and using your body to create pressure and force them to release the choke.
Escaping the Choke
If you find yourself caught in a Guillotine Choke, it’s important to stay calm and execute your escape technique effectively. Focus on creating space and breaking the opponent’s grip while maintaining control of your body. Practice escape techniques regularly to build confidence and improve your ability to defend against the choke.
Training the Guillotine Choke
Drills and Exercises
Include specific drills and exercises in your training routine to improve your Guillotine Choke technique. Some effective drills include:
Partner Drills: Work with a partner to practice securing and applying the Guillotine Choke from various positions. Focus on improving your grip, control, and pressure.
Positional Drills: Practice applying the Guillotine Choke from different positions, like closed guard, mount, and sprawl. This will help you develop a versatile and adaptable technique.
Flow Drills: Combine the Guillotine Choke with other submissions and transitions to create a smooth flow of techniques. This will improve your ability to apply the choke in dynamic situations.
Partner Training
Training with partners is essential for developing a strong Guillotine Choke. Work with different partners to experience various body types and resistance levels. Focus on maintaining control and applying the choke effectively while ensuring the safety of your training partners.
Solo Drills
While partner training is important, solo drills can also help you improve your Guillotine Choke technique. Some effective solo drills include:
Grip Strengthening: Use grip strength exercises, like squeezing a tennis ball or using a grip trainer, to improve your ability to secure the choke.
Neck Strengthening: Do neck strengthening exercises, like neck bridges and resistance band exercises, to build the strength needed to apply and defend against the choke.
The Guillotine Choke in MMA
Applications in MMA
The Guillotine Choke is a powerful tool in MMA, offering a reliable way to submit opponents from various positions. Its effectiveness lies in its versatility and ability to counter aggressive takedown attempts. By including the Guillotine Choke in your MMA training, you can develop a well-rounded and effective submission game.
Training for MMA
To effectively include the Guillotine Choke in your MMA training, focus on the following areas:
Takedown Defense: Develop strong takedown defense skills to create opportunities for the Guillotine Choke.
Clinch Work: Practice securing the Guillotine Choke from the clinch and using it to control and submit opponents.
Ground and Pound: Combine the Guillotine Choke with ground and pound techniques to create a well-rounded and effective MMA game.
The Guillotine Choke in Self-Defense
Real-World Applications
The Guillotine Choke is a valuable tool for self-defense, offering a reliable way to stop an attacker. By applying the choke, you can quickly stop the attacker and create an opportunity to escape or get help. The choke’s effectiveness in real-world situations makes it a valuable addition to any self-defense plan.
Legal Considerations
When using the Guillotine Choke in self-defense, it’s important to be aware of the legal considerations. Always prioritize your safety and the safety of others, and use the choke only when necessary to protect yourself. Be mindful of the potential legal implications and seek legal advice if needed.
Safety Tips
To ensure your safety and the safety of others when using the Guillotine Choke in self-defense, follow these tips:
Practice Regularly: Regular practice will help you develop the skills and confidence needed to apply the choke effectively.
Stay Calm: In a self-defense situation, remain calm and focused. Avoid panicking and execute the choke with control and precision.
Know When to Release: Be aware of the signs that the attacker is stopped and release the choke once they are no longer a threat.
Advanced Techniques and Transitions
Combining with Other Submissions
The Guillotine Choke can be combined with other submissions to create a smooth flow of techniques. Some effective combinations include:
Guillotine to Armbar: Transition from the Guillotine Choke to an armbar by securing the opponent’s arm and applying pressure.
Guillotine to Triangle Choke: Use the Guillotine Choke to set up a triangle choke by trapping the opponent’s arm and leg.
Guillotine to Kimura: Transition from the Guillotine Choke to a Kimura by securing the opponent’s arm and applying pressure.
Transitioning to Sweeps
The Guillotine Choke can also be used to set up sweeps and reversals. Some effective transitions include:
Guillotine to Hip Bump Sweep: Use the Guillotine Choke to create space and execute a hip bump sweep.
Guillotine to Butterfly Sweep: Transition from the Guillotine Choke to a butterfly sweep by securing the opponent’s head and using your legs to create space.
Brazilian Jiu-Jitsu (BJJ) is a martial art that focuses on ground fighting and submission holds. One of the most effective moves in BJJ is the D’Arce Choke. Named after Joe D’Arce, this choke is popular in both BJJ and mixed martial arts (MMA). In this guide, we’ll explore the history, how to do it, different versions, and why it’s useful.
The D’Arce Choke: An Overview
The D’Arce Choke, also called the no-gi brabo choke, is a type of arm triangle choke. It uses both arms to wrap around the opponent’s neck, trapping one of their arms inside. The goal is to cut off blood flow to the brain, making the opponent submit. This choke is similar to the anaconda choke but has different arm positions.
History of the D’Arce Choke
The D’Arce Choke is named after Joe D’Arce, an American grappler who made it famous in competitions. Joe learned the choke from John Danaher at the Renzo Gracie Academy in New York. Some say the choke may have started in Germany with a luta livre competitor named Björn Dag Lagerström. Marc Laimon, a well-known grappling coach, named it after Joe D’Arce because of his success with it in tournaments.
Mechanics of the D’Arce Choke
Understanding the Arm Triangle Choke
The D’Arce Choke is a type of arm triangle choke. To understand the D’Arce, you need to know the basics of the arm triangle. This choke uses your arms to form a triangle around the opponent’s neck, trapping one of their arms inside. The goal is to squeeze the carotid arteries, cutting off blood flow to the brain and making the opponent submit.
The D’Arce Choke vs. The Anaconda Choke
The D’Arce Choke and the anaconda choke look similar but have different arm positions. In the D’Arce Choke, your arms are locked beside the opponent’s neck. In the anaconda choke, the arms are locked outside beside the opponent’s shoulder. Knowing this difference is key to doing each choke correctly.
How to Perform the D’Arce Choke
Step-by-Step Guide
Entry from the Front Headlock Position:
Start in the front headlock position, with your opponent’s head and one arm trapped.
Slide your arm under the opponent’s neck, reaching for your own bicep.
Locking the Choke:
Use your free hand to grab your bicep, creating a tight lock around the opponent’s neck.
Squeeze your arms together, applying pressure to the opponent’s neck and trapped arm.
Finishing the Choke:
To finish the choke, drive your shoulder into the opponent’s neck while squeezing your arms.
Apply steady pressure until the opponent taps out or loses consciousness.
Common Mistakes to Avoid
Incorrect Arm Positioning: Make sure your arms are in the right place to create the needed pressure.
Not Enough Pressure: Apply firm and steady pressure to get the submission.
Bad Body Positioning: Keep your body aligned properly to make the choke work best.
Variations of the D’Arce Choke
Gi vs. No-Gi D’Arce Choke
The D’Arce Choke can be done in both gi and no-gi situations. In gi, it’s often called the brabo choke, which uses the opponent’s lapel to finish the choke. The no-gi version relies only on arm positioning and pressure.
The Brabo Choke
The brabo choke, created by BJJ black belt Milton Vieira, is a gi version of the D’Arce Choke. It uses the opponent’s lapel to add more leverage and pressure, making the choke even stronger.
Applications in BJJ and MMA
BJJ Competitions
The D’Arce Choke is popular in BJJ competitions because it’s versatile and effective. It can be used from many positions, like the front headlock, turtle, and side control. Mastering this choke can give you an edge in both gi and no-gi competitions.
MMA Fights
In MMA, the D’Arce Choke is a great tool for fighters looking to win by submission. It’s effective in no-gi situations, making it a favorite for many MMA fighters. The choke can be applied from the clinch, ground, or even during scrambles, making it a versatile weapon in an MMA fighter’s toolkit.
Training Tips for the D’Arce Choke
Drilling the Technique
Practice the D’Arce Choke regularly to master it. Repeat the entry, lock, and finish to build muscle memory and precision. Focus on keeping your body in the right position and applying steady pressure.
Sparring and Live Rolling
Use the D’Arce Choke in your sparring and live rolling sessions. This helps you learn how to apply the choke in real situations against resisting opponents. Watch how your opponent reacts and adjust your technique as needed.
Strength and Conditioning
Building strength and conditioning can help you apply the D’Arce Choke better. Focus on exercises that target your grip, shoulders, and core. This will improve your ability to maintain pressure and control during the choke.
FAQs
What is the D’Arce Choke?
The D’Arce Choke is a submission move in Brazilian Jiu-Jitsu that uses both arms to wrap around the opponent’s neck, trapping one of their arms inside. The goal is to cut off blood flow to the brain, making the opponent submit.
How is the D’Arce Choke different from the anaconda choke?
The main difference is in the arm positions. In the D’Arce Choke, your arms are locked beside the opponent’s neck. In the anaconda choke, the arms are locked outside beside the opponent’s shoulder.
Can the D’Arce Choke be done in both gi and no-gi situations?
Yes, the D’Arce Choke can be done in both gi and no-gi situations. In gi, it’s often called the brabo choke, which uses the opponent’s lapel to finish the choke.
What are common mistakes to avoid when doing the D’Arce Choke?
Common mistakes include incorrect arm positioning, not enough pressure, and bad body positioning. Make sure to use proper technique and apply steady pressure to successfully apply the choke.
How can I improve my D’Arce Choke?
Practice regularly, use the choke in sparring and live rolling, and build strength and conditioning to improve your D’Arce Choke.
Is the D’Arce Choke effective in MMA?
Yes, the D’Arce Choke is a valuable tool in MMA because it’s effective in no-gi situations. It can be used from many positions, making it a versatile weapon for MMA fighters.
Conclusion
The D’Arce Choke is a powerful and versatile submission move in Brazilian Jiu-Jitsu and MMA. By learning its history, mechanics, variations, and applications, you can master this choke and add it to your skill set. Regular practice, proper technique, and strength training are key to becoming good at the D’Arce Choke. Whether you’re a BJJ competitor or an MMA fighter, mastering this choke can give you a big advantage on the mat or in the cage.
Brazilian Jiu-Jitsu (BJJ) is a martial art that focuses on ground fighting and submission holds. One powerful move in BJJ is the Anaconda Choke. This article will explain the choke, its history, how to do it, and different ways to use it. Whether you’re new to BJJ or have been practicing for a while, learning this move can make you a better grappler.
Introduction to the Anaconda Choke
What is the Anaconda Choke?
The Anaconda Choke is a move in Brazilian Jiu-Jitsu that targets the opponent’s neck and arm. It works like how a snake squeezes its prey. This choke is a type of arm-triangle choke, where your arm goes around the opponent’s neck and one arm, cutting off blood flow to their brain.
Why is it important in BJJ?
In BJJ, the Anaconda Choke is important because it is very effective and can be used in many situations. Learning this choke can make your submission game stronger and give you an advantage over your opponents.
History of the Anaconda Choke
Where did it come from?
The Anaconda Choke is believed to have been created by Brazilian fighter Milton Vieira. Vieira is known for his innovative techniques in BJJ and MMA, and this choke is one of his most famous moves.
How has it changed over time?
Over the years, the Anaconda Choke has evolved. Fighters have developed new ways to set it up and finish it. It has become popular in both BJJ and MMA, with fighters like Ryan Garcia using it in competitions.
Anatomy of the Anaconda Choke
How does it work?
The Anaconda Choke is simply an arm-triangle choke. Your arm goes around the opponent’s neck and one arm, creating a triangle shape. This triangle applies pressure to the carotid arteries, which are the main blood vessels to the brain.
What happens to the blood flow?
The choke works by cutting off blood flow to the brain. When you trap the opponent’s arm and neck, you apply pressure that stops blood from reaching their brain. This can make the opponent tap out or pass out.
Setting Up the Anaconda Choke
Snap Down Technique
One common way to set up the choke is the snap-down technique. This involves pulling the opponent’s head and upper body down, making them vulnerable. From here, you can move into the front headlock position.
Moving from Front Headlock
Once you have the front headlock, you can start setting up the Anaconda Choke. Thread one arm under the opponent’s neck and connect it to the bicep of your other arm. Then, roll the opponent over the trapped arm to tighten the choke.
How to Do the Anaconda Choke
Step-by-Step Guide
Secure the Front Headlock: Start by getting a front headlock on your opponent, making sure you control their head and neck.
Thread the Arm: Thread your arm under the opponent’s neck, reaching for your bicep on the other arm.
Connect the Hands: Connect your hands, creating a tight grip around the opponent’s neck and arm.
Roll the Opponent: Perform a gator roll, rolling the opponent over the trapped arm to tighten the choke.
Apply Pressure: Squeeze your arms and apply pressure, cutting off blood flow to the opponent’s brain.
Common Mistakes to Avoid
Incorrect Arm Placement: Make sure your arm is properly threaded under the opponent’s neck to apply maximum pressure.
Ineffective Grip: Keep a strong grip to prevent the opponent from escaping.
The Gator Roll is a popular way to finish the move. You roll the opponent over the trapped arm to tighten the choke. This rolling motion also makes it harder for the opponent to defend.
Modified Anaconda Choke
Sometimes, fighters modify it to fit their style or the situation. These changes can include different grips, body positions, or angles of pressure, making the choke more personalized.
How to Defend Against the Anaconda Choke
Spotting the Setup
The first step in defending against this choke is recognizing the setup. By knowing the common setups, like the snap down or front headlock, you can anticipate the choke and take action to stop it.
Effective Counters
Good counters to the move include breaking the opponent’s grip, creating space to breathe, and using leverage to escape. Practicing these counters can help you stay calm and escape the choke during a match.
Training Drills for the Anaconda Choke
Partner Drills
Partner drills are important for learning this move. These drills let you practice the choke in a controlled setting, improving your technique and building muscle memory.
Solo Drills
Solo drills can also help. These drills focus on building the strength, flexibility, and coordination needed to do it well.
Importance of Grip Strength
Building Grip Strength
Grip strength is key in all grappling or combat sports. Building grip strength with exercises like deadlifts, pull-ups, and grip trainers can help you hold and maintain the choke.
Grip Training Exercises
Add grip training exercises to your routine to improve your grip strength. These exercises can include farmer’s walks, plate pinches, and wrist curls, all of which target the muscles needed for a strong grip.
Role of Body Positioning
Keeping Control
Keeping control over your opponent is important for getting the submission. Good body positioning helps you apply pressure effectively and stop the opponent from escaping.
Best Angles for Pressure
Knowing the best angles for applying pressure can make the difference between a successful choke and a failed one. Try different angles to find what works best for you.
Adding the Anaconda Choke to Your Game
Combining with Other Moves
This choke can be combined with other submissions to create a versatile game. For example, moving from the Anaconda Choke to an armbar or triangle choke can surprise opponents and increase your chances of winning.
Switching Between Techniques
Smooth transitions between techniques are key to a successful grappling game. Practice switching between the Anaconda Choke and other submissions to develop a fluid and dynamic approach.
Common Mistakes and How to Avoid Them
Incorrect Arm Placement
One common mistake in doing the Anaconda Choke is incorrect arm placement. Make sure your arm is properly threaded under the opponent’s neck to apply maximum pressure.
Ineffective Pressure Application
Applying ineffective pressure can result in a failed choke. Focus on keeping a strong grip and applying consistent pressure to cut off blood flow and secure the submission.
Benefits of Mastering the Anaconda Choke
Competitive Edge
Mastering this move just gives you a competitive edge in both BJJ and MMA. Its versatility and effectiveness make it a valuable tool for any grappler.
Versatility in Grappling
The choke’s versatility allows it to be used in many positions and situations, making it a valuable addition to any grappler’s game. Whether you’re in a tournament or a sparring session, this move can be a game-changer.
FAQs
What is the Anaconda Choke?
The choke is a move in Brazilian Jiu-Jitsu that targets the opponent’s neck and arm, creating a constriction similar to how a snake subdues its prey.
How do you set up the Anaconda Choke?
The choke can be set up using techniques like the snap down, which forces the opponent into a vulnerable position, allowing the practitioner to transition into the front headlock and secure the choke.
What are the common mistakes in executing the Anaconda Choke?
Common mistakes include incorrect arm placement, ineffective grip, and poor body positioning. Ensuring proper technique and maintaining control are key to executing the choke successfully.
How can you defend against the Anaconda Choke?
Defensive strategies include recognizing the setup, breaking the practitioner’s grip, creating space to breathe, and using leverage to escape the choke.
What are the benefits of mastering the Anaconda Choke?
Mastering the Anaconda Choke provides a competitive edge, enhances your submission game, and offers versatility in various grappling scenarios.
Can the Anaconda Choke be used in MMA?
Yes, the choke is effective in both BJJ and MMA, with many fighters incorporating it into their repertoire to secure submissions in high-stakes competitions.
Conclusion
The Anaconda Choke is a powerful and versatile submission technique that can significantly enhance your grappling game. By understanding its history, mechanics, and execution, you can master this choke and use it to gain a competitive edge in both BJJ and MMA. Remember to practice regularly, refine your technique, and stay committed to continuous improvement.
Brazilian Jiu-Jitsu (BJJ) is a martial art that focuses on ground fighting and submission holds. One of the most effective and versatile moves in BJJ is the Kimura lock. Named after the famous judoka Masahiko Kimura, this move has a rich history and many uses. In this guide, we’ll explore the Kimura, including its history, how to do it, different variations, and why it’s important in both BJJ and mixed martial arts (MMA).
Introduction to the Kimura
What is the Kimura?
The Kimura lock, also called the double wristlock, is a strong submission move used in Brazilian Jiu-Jitsu (BJJ) and mixed martial arts (MMA). It targets the shoulder joint, forcing the opponent to submit or risk serious injury. The Kimura is named after Masahiko Kimura, a famous judoka who used this move to defeat Helio Gracie in 1951.
Importance in BJJ and MMA
The Kimura is a key move in BJJ and MMA because it’s versatile and effective. You can use it from many positions, like guard, side control, and even standing. It helps you control and submit opponents, making it a valuable tool for grapplers and fighters. Learning the Kimura can greatly improve your overall grappling skills, giving you a reliable submission option in both competitions and self-defense situations.
History of the Kimura
Origins in Judo
The Kimura lock comes from judo, where it’s called the “gyaku ude-garami” or reverse arm entanglement. This move was used in judo long before it became popular in BJJ. It controls and submits opponents by twisting the shoulder joint, a principle that hasn’t changed.
Masahiko Kimura vs. Helio Gracie
The Kimura lock became famous on October 23, 1951, when Masahiko Kimura used it to defeat Helio Gracie in a historic match. Kimura, one of the greatest judokas ever, was challenged by the Gracie family to test their Brazilian Jiu-Jitsu against his judo. The match ended with Kimura using the gyaku ude-garami, which the Gracies later named the Kimura in his honor.
Evolution in BJJ
Since it was introduced to BJJ, the Kimura has evolved to fit the sport’s unique style. BJJ practitioners have created many variations and setups for the Kimura, making it a versatile and essential part of grappling. Today, it’s a basic move taught to students of all levels, from beginners to advanced competitors.
Anatomy of the Kimura Lock
Key Parts
The Kimura lock has several key parts that work together to create a strong submission. These include:
Grip: You secure a figure-four grip on the opponent’s arm, with one hand holding their wrist and the other hand gripping your own wrist.
Positioning: Proper body positioning is crucial to maximize leverage and control. You must position your body to isolate the opponent’s arm and shoulder.
Leverage: By using your body weight and positioning, you apply pressure to the opponent’s shoulder joint, forcing it into an unnatural and painful position.
How It Works
The Kimura lock works by twisting the shoulder joint beyond its normal range of motion. This is done by:
Isolating the Arm: Your grip and positioning isolate the opponent’s arm, preventing them from using their body to defend.
Rotating the Shoulder: You use your body to rotate the opponent’s shoulder joint, creating immense pressure on the ligaments and tendons.
Applying Force: By leveraging your body weight and positioning, you apply force to the shoulder joint, causing pain and potential injury if the opponent does not submit.
Basic Kimura Technique
Step-by-Step Guide
Doing the Kimura lock requires precision and attention to detail. Here’s a step-by-step guide to performing the basic Kimura from the guard position:
Secure the Grip: From the guard position, reach over your opponent’s arm and secure a figure-four grip. Your right hand should grab their wrist, and your left hand should grab your own wrist.
Break the Posture: Use your legs to break your opponent’s posture, pulling them forward and off balance.
Hip Escape: Perform a hip escape to create an angle, positioning your body perpendicular to your opponent.
Isolate the Arm: Use your legs to trap your opponent’s arm, preventing them from defending.
Apply the Lock: Rotate your body and use your arms to apply pressure to the opponent’s shoulder joint, forcing them to submit.
Common Mistakes to Avoid
When doing the Kimura, it’s important to avoid common mistakes that can weaken the move:
Poor Grip: Make sure your figure-four grip is secure and tight. A loose grip can let your opponent escape.
Incorrect Positioning: Proper body positioning is crucial. Make sure to create an angle and isolate the opponent’s arm effectively.
Lack of Control: Maintain control of your opponent’s posture and arm throughout the move. Losing control can result in a failed submission attempt.
Kimura from Guard
Closed Guard
The closed guard is one of the most common positions to do the Kimura. From this position, you can effectively control your opponent’s posture and isolate their arm for the submission.
Half Guard
The half guard offers unique chances to set up the Kimura. By using your legs to control your opponent’s lower body, you can create openings to secure the figure-four grip and apply the lock.
Butterfly Guard
The butterfly guard allows for dynamic transitions and setups for the Kimura. By using your hooks to control your opponent’s movement, you can create angles and opportunities to secure the submission.
Kimura from Top Position
Side Control
From side control, the Kimura can be a powerful submission option. By isolating your opponent’s arm and using your body weight to control their movement, you can apply the lock with significant leverage.
Mount
The mount position provides excellent control and opportunities to set up the Kimura. By maintaining a dominant position, you can isolate your opponent’s arm and apply the submission with minimal resistance.
North-South Position
The north-south position offers unique angles and leverage for the Kimura. By controlling your opponent’s upper body and isolating their arm, you can apply the lock with precision and force.
Kimura from Standing Position
Takedown Setups
The Kimura can be used as a setup for takedowns from the standing position. By securing the figure-four grip and using your body weight to off-balance your opponent, you can transition to a takedown and apply the submission on the ground.
Transition to Ground
From the standing position, the Kimura can be used to transition to the ground while maintaining control of your opponent’s arm. This allows for smooth transitions and opportunities to apply the submission.
Defending the Kimura
Recognizing the Setup
The first step in defending the Kimura is recognizing the setup. By being aware of your opponent’s movements and grip, you can anticipate the submission attempt and take preventive measures.
Effective Counters
Effective counters to the Kimura include:
Posturing Up: By posturing up and creating distance, you can prevent your opponent from securing the figure-four grip.
Rolling Out: Rolling out of the submission can help you escape the lock and regain a neutral position.
Using Your Free Hand: Use your free hand to break your opponent’s grip and create space to escape.
Escaping the Lock
If your opponent has already secured the Kimura, escaping the lock requires quick and decisive action. Techniques for escaping the Kimura include:
Rotating Your Arm: Rotate your arm in the opposite direction of the lock to relieve pressure and create space to escape.
Bridging and Rolling: Use a bridge and roll technique to create momentum and escape the submission.
Advanced Kimura Variations
Kimura Trap System
The Kimura Trap System is an advanced series of techniques that use the Kimura grip to control and submit opponents from various positions. This system allows for dynamic transitions and multiple submission options.
Reverse Kimura
The Reverse Kimura is a variation that targets the opponent’s arm from a different angle. This technique can catch opponents off guard and provide unique submission opportunities.
Kimura to Armbar Transition
The Kimura to Armbar transition is a powerful combination that allows for smooth transitions between submissions. By using the Kimura grip to control your opponent’s arm, you can transition to an armbar and apply additional pressure.
Kimura in MMA
Notable MMA Fighters Using Kimura
Several notable MMA fighters have successfully used the Kimura in their fights, including:
Kazushi Sakuraba: Known as the “Gracie Hunter,” Sakuraba used the Kimura to defeat several members of the Gracie family.
Frank Mir: Mir used the Kimura to submit Antonio Rodrigo Nogueira in a memorable UFC fight.
Strategic Applications in Fights
The Kimura is a valuable tool in MMA due to its versatility and effectiveness. It can be used to control opponents, set up transitions, and secure submissions in various positions.
Training Drills for Kimura
Solo Drills
Solo drills for the Kimura include:
Shadow Kimura: Practice the figure-four grip and body positioning without a partner.
Resistance Band Drills: Use resistance bands to simulate the pressure and leverage of the Kimura.
Partner Drills
Partner drills for the Kimura include:
Positional Drills: Practice the Kimura from various positions with a partner.
Flow Drills: Combine the Kimura with other techniques in a flowing sequence.
Sparring Scenarios
Incorporate the Kimura into sparring scenarios to practice applying the submission in live situations. Focus on maintaining control and transitioning between positions.
Common Injuries and Prevention
Shoulder Injuries
The Kimura targets the shoulder joint, making it susceptible to injuries such as dislocations and ligament damage. Proper technique and control are essential to prevent injuries.
Prevention Techniques
To prevent injuries when applying or defending the Kimura:
Use Proper Technique: Ensure that you are using correct technique and control when applying the submission.
Tap Early: If you are caught in a Kimura, tap early to avoid injury.
Strengthen Shoulders: Strengthen the muscles around the shoulder joint to increase stability and resilience.
Rest and Ice: Rest the injured shoulder and apply ice to reduce inflammation.
Physical Therapy: Work with a physical therapist to regain strength and mobility.
Gradual Return: Gradually return to training, focusing on proper technique and control.
Kimura in Self-Defense
Practical Applications
The Kimura can be an effective self-defense technique due to its ability to control and submit an attacker. It can be used to neutralize threats and create opportunities to escape.
Real-World Scenarios
In real-world self-defense scenarios, the Kimura can be applied from various positions to control and submit an attacker. It is a valuable tool for personal safety and protection.
FAQs
What is the Kimura lock?
The Kimura lock is a submission technique in Brazilian Jiu-Jitsu that targets the shoulder joint. It involves securing a figure-four grip on the opponent’s arm and applying pressure to force a submission.
How do you execute a Kimura?
To execute a Kimura, secure a figure-four grip on your opponent’s arm, break their posture, create an angle, isolate the arm, and apply pressure to the shoulder joint.
Can the Kimura be used in MMA?
Yes, the Kimura is commonly used in MMA due to its effectiveness and versatility. It can be applied from various positions and is a valuable tool for controlling and submitting opponents.
What are common mistakes when applying the Kimura?
Common mistakes when applying the Kimura include poor grip, incorrect positioning, and lack of control. Ensuring proper technique and attention to detail is essential for success.
How can you defend against a Kimura?
To defend against a Kimura, recognize the setup, posture up, roll out, and use your free hand to break your opponent’s grip. Quick and decisive action is crucial for escaping the submission.
Conclusion
The Kimura lock is a powerful and versatile submission technique that has stood the test of time. From its origins in judo to its prominence in Brazilian Jiu-Jitsu and MMA, the Kimura continues to be a valuable tool for grapplers and fighters. By mastering the Kimura, practitioners can enhance their grappling skills, improve their overall game, and gain a deeper understanding of the art of submission. Whether you are a beginner or an advanced practitioner, the Kimura offers endless opportunities for growth and development in the world of martial arts.
Wrestling is a sport that has been around for a very long time. Over the years, it has developed into different styles that people love all over the world. The three main styles are Folkstyle, Freestyle, and Greco-Roman wrestling. Each style has its own rules and techniques, making them unique. This article will help you understand the differences between these three wrestling styles.
Introduction to Wrestling Styles
Historical Background
Wrestling is one of the oldest sports in the world. People have been wrestling for thousands of years. Different cultures created their own styles of wrestling, which led to the different types we have today.
Global Popularity
Wrestling is popular all over the world. Folkstyle is mostly practiced in the United States. Freestyle and Greco-Roman wrestling are popular in many countries and are part of the Olympics.
Folkstyle Wrestling
Origins and Development
Folkstyle wrestling, also called Collegiate wrestling, is mainly practiced in the United States. It started from different folk wrestling styles brought by immigrants and has become the style used in high schools and colleges.
Rules and Scoring
In Folkstyle wrestling, the goal is to control your opponent. You get points for takedowns, escapes, reversals, and near falls. If you pin your opponent’s shoulders to the mat, you win the match.
Techniques and Strategies
Folkstyle wrestling allows leg attacks, like single-leg and double-leg takedowns. Wrestlers also try to control their opponent on the mat to earn extra points.
Training and Competitions
Training for Folkstyle wrestling includes physical conditioning, practicing techniques, and live sparring. Competitions range from local high school meets to the NCAA Championships, which is a big event in American wrestling.
Freestyle Wrestling
Origins and Development
Freestyle wrestling comes from catch-as-catch-can wrestling, which was popular in the 1800s. It is now a major part of international competitions, including the Olympics.
Rules and Scoring
Freestyle wrestling allows many different techniques, including leg attacks and throws. You get points for takedowns, exposures, and reversals. The goal is to pin your opponent or score more points by the end of the match.
Techniques and Strategies
Freestyle wrestling is known for its fast and exciting moves. Wrestlers use high-amplitude throws and leg attacks to score points. The focus is on quick transitions and keeping a high pace.
Training and Competitions
Freestyle wrestlers train hard with strength and conditioning, practicing techniques, and live sparring. Major competitions include the World Championships and the Olympic Games.
Greco-Roman Wrestling
Origins and Development
Greco-Roman wrestling is one of the oldest forms of wrestling, dating back to ancient Greece and Rome. It was included in the first modern Olympic Games in 1896.
Rules and Scoring
Greco-Roman wrestling is different because it does not allow attacks below the waist. Points are given for throws, exposures, and reversals. The goal is to pin your opponent or score more points by the end of the match.
Techniques and Strategies
Greco-Roman wrestling focuses on upper-body techniques, like throws and clinches. Wrestlers use their strength to perform powerful moves that can change the match quickly.
Training and Competitions
Training for Greco-Roman wrestling includes strength training, practicing techniques, and live sparring. Major competitions include the World Championships and the Olympic Games.
Comparative Analysis
Key Differences
The main differences between Folkstyle, Freestyle, and Greco-Roman wrestling are in their rules and techniques. Folkstyle focuses on control and riding time, Freestyle allows many leg attacks and throws, and Greco-Roman only uses upper-body techniques.
Similarities
All three styles aim to pin the opponent or score more points. They all require physical conditioning, technical skill, and mental toughness.
Cultural Significance
Each wrestling style is important in different parts of the world. Folkstyle is popular in American schools, Freestyle is big in international competitions, and Greco-Roman has historical roots in ancient civilizations.
Training and Preparation
Physical Conditioning
Wrestlers need to be in great shape to compete. This means doing strength training, cardio, and flexibility exercises.
Mental Preparation
Mental toughness is very important in wrestling. Wrestlers need to stay focused and calm under pressure. Techniques like visualization and mindfulness can help.
Diet and Nutrition
Good nutrition is key for wrestlers to stay in shape and perform well. A balanced diet with protein, carbs, and healthy fats, along with plenty of water, is important.
Famous Wrestlers and Their Styles
Notable Folkstyle Wrestlers
Cael Sanderson: An Olympic gold medalist and one of the best collegiate wrestlers ever.
Dan Gable: A legendary wrestler and coach, known for his success in Folkstyle wrestling.
Notable Freestyle Wrestlers
Jordan Burroughs: An Olympic gold medalist and multiple-time World Champion in Freestyle wrestling.
Aleksandr Karelin: A dominant Freestyle wrestler known for his incredible strength and technique.
Notable Greco-Roman Wrestlers
Rulon Gardner: An Olympic gold medalist who famously beat Aleksandr Karelin in the 2000 Olympics.
Mijaín López: A Cuban wrestler who has won multiple Olympic gold medals in Greco-Roman wrestling.
Impact on Other Combat Sports
Influence on MMA
Wrestling techniques are widely used in Mixed Martial Arts (MMA). Wrestlers often do well in MMA because of their grappling skills and ability to control opponents.
Influence on Brazilian Jiu-Jitsu
Wrestling has influenced Brazilian Jiu-Jitsu (BJJ) by adding effective takedowns and control techniques. Many BJJ practitioners use wrestling moves in their training.
Influence on Boxing
While wrestling and boxing are different, the physical conditioning and mental toughness from wrestling can help boxers. Wrestlers also learn balance and leverage, which are useful in boxing.
FAQs
What is the main difference between Folkstyle and Freestyle wrestling?
The main difference is in the rules and scoring. Folkstyle focuses on control and riding time, while Freestyle allows more techniques, including leg attacks and throws.
Can a wrestler compete in all three styles?
Yes, many wrestlers train in multiple styles to improve their skills and compete in different competitions.
How does Greco-Roman wrestling differ from the other two styles?
Greco-Roman wrestling does not allow attacks below the waist and focuses only on upper-body techniques, while Folkstyle and Freestyle allow leg attacks.
What are the benefits of training in multiple wrestling styles?
Training in multiple styles can make a wrestler more versatile, improve their technical skills, and help them adapt to different situations.
How do the rules of scoring differ between the three styles?
Folkstyle rewards control and riding time, Freestyle gives points for many techniques, and Greco-Roman focuses on upper-body throws and exposures.
Which style is most popular in the United States?
Folkstyle wrestling is the most popular in the United States, especially in high schools and colleges.
Conclusion
Wrestling is a diverse and exciting sport with a long history. Whether it’s the control-focused Folkstyle, the fast-paced Freestyle, or the upper-body-focused Greco-Roman, each style offers unique challenges and rewards. By understanding the differences and appreciating each style, wrestlers and fans can enjoy this timeless sport even more.
Brazilian Jiu-Jitsu (BJJ) is a martial art that focuses on ground fighting and submission holds. One of the key moves in BJJ is shrimping. This technique helps you create space and escape from tough positions. This guide will explain shrimping, its variations, and common mistakes to avoid. Whether you’re new or experienced, learning shrimping is crucial for improving your skills in BJJ.
What is Shrimping in BJJ?
Shrimping, also called the hip escape, is a basic move in BJJ. It involves moving your hips away from your opponent to create space. This move is important for escaping from bottom positions, like when your opponent is on top of you. By shrimping well, you can regain control or move to a better position.
History of BJJ Shrimping
Shrimping started in the early days of Brazilian Jiu-Jitsu. The Gracie family, who developed BJJ, created and improved this move. Over time, shrimping has become a key part of BJJ training for all levels.
Why Learn Shrimping?
Learning shrimping is important for several reasons. First, it helps you escape from tough positions, making you a better grappler. Second, shrimping improves your mobility and flexibility, which are important for many BJJ techniques. Lastly, mastering shrimping boosts your confidence on the mat, knowing you have a reliable escape move.
Variations in Shrimping
Backward or Reverse Shrimping
Backward shrimping involves moving your hips backward while pushing off with your feet. This is often used to escape from mount or side control.
Forward Shrimping
Forward shrimping involves moving your hips forward. This is useful for moving from guard to a more offensive position.
Sideways Shrimping
Sideways shrimping is a lateral move that helps you create space and reposition yourself. This is effective when your opponent is pressuring you from the side.
Shrimping Improves Mobility
Good shrimping greatly improves your range of motion and overall mobility. By practicing different hip movements, like the regular hip escape, double hip escape, and sitting hip escape, you can move better on the mat. This increased mobility helps with both escapes and offensive moves.
Defensive Shrimping
Defensive shrimping is mainly used to escape from tough positions. By creating space and repositioning yourself, you can stop your opponent’s attacks and regain control. This is especially useful when your opponent is in mount or side control.
Offensive Shrimping
Spider Guard Triangle
The spider guard triangle is an offensive move that uses shrimping to create space and set up a triangle choke. By shrimping well, you can position your legs to trap your opponent’s arm and neck, leading to a submission.
Closed Guard Triangle
Similar to the spider guard triangle, the closed guard triangle also relies on good shrimping. By creating space and moving your hips, you can set up a triangle choke from the closed guard position.
Half Guard Sweep
The half guard sweep is another offensive move that benefits from good shrimping. By creating space and shifting your hips, you can off-balance your opponent and execute a sweep, moving to a better position.
Most Common BJJ Shrimping Mistakes
Turns to the Same Side
One common mistake in shrimping is turning to the same side as your shrimping leg. This makes the move less effective and limits your ability to create space. Always move to the opposite side of your shrimping leg to make the move work better.
Staying Flat on the Ground
Another mistake is staying flat on the ground while shrimping. To move better, raise your hips and shift your weight to your knees and shoulders. This allows for a more effective escape and better positioning.
Small Movements
Small movements can use a lot of energy and be less effective. When shrimping, aim to make larger, more deliberate movements to create significant space and improve your positioning.
Conclusion
Mastering shrimping in Brazilian Jiu-Jitsu is key for both defensive and offensive moves. By understanding the variations, improving your mobility, and avoiding common mistakes, you can get better on the mat. Whether you’re new or experienced, adding shrimping to your training will make you a more effective grappler.
FAQs
How often should I practice shrimping in BJJ?
Practice shrimping regularly, ideally during every training session, to develop muscle memory and improve your technique.
Can shrimping help in other martial arts?
Yes, shrimping is a basic move that can be useful in other grappling-based martial arts, like judo and wrestling.
What are some drills to improve shrimping?
Drills like the hip escape drill, partner shrimping, and resistance band shrimping can help improve your technique and mobility.
Is shrimping effective for self-defense?
Yes, shrimping is a good technique for creating space and escaping from tough positions in self-defense situations.
Can I use shrimping in MMA?
Absolutely. Shrimping is a valuable move in MMA for escaping from ground positions and moving to better positions.
What should I focus on when shrimping?
Focus on creating space, keeping proper body alignment, and making deliberate, effective movements to make the move work better.
Brazilian Jiu-Jitsu (BJJ) is a martial art that focuses on ground fighting and submission holds. One of the most useful positions in BJJ is the Knee Shield half-guard. This position helps you control and defend against bigger opponents while setting up sweeps, back takes, and submissions. In this guide, we will explore the basics, strategies, and techniques of the Knee Shield Half Guard, giving you the skills to master this important position.
Introduction to Knee Shield Half Guard
What is the Knee Shield Half Guard?
The Knee Shield Half Guard is a defensive position in Brazilian Jiu-Jitsu where you use your knee as a barrier to control your opponent’s movement. In this position, you hook one foot around your opponent’s ankle and use your other leg to block their body by placing your knee near their shoulder or chest. Your knee acts as a shield, stopping your opponent from putting their weight on you.
History and Evolution of the Knee Shield Half-Guard
The Knee Shield half-guard has changed over the years as people have improved and adapted the position to fit different grappling styles. At first, the half-guard was mainly a defensive position, but as BJJ evolved, so did the techniques and strategies. The Knee Shield version came about as a way to create more space and control, allowing you to set up offensive moves while staying safe.
Fundamentals of the Knee Shield Half Guard
Basic Positioning
To use the Knee Shield Half Guard well, you need to be in the right position. Start by lying on your side with your bottom leg hooked around your opponent’s ankle. Your top leg should be bent, with your knee against your opponent’s chest or shoulder. This knee acts as a shield, stopping your opponent from getting too close. Use your arms to frame and control your opponent’s upper body, with one arm blocking their shoulder and the other watching their arm.
Importance of Framing
Framing is a key part of the Knee Shield Half Guard. By using your arms to create frames, you can keep your distance and control your opponent’s movement. The frames act as extra barriers, stopping your opponent from breaking your knee shield and passing your guard. Good framing needs constant adjustment and awareness, as your opponent will try to break your frames and move forward.
Common Mistakes to Avoid
While the Knee Shield Half Guard is a strong position, it has some common mistakes:
Improper Knee Placement: If your knee is too low or too high, it won’t work well as a shield.
Weak Framing: Not keeping strong frames can let your opponent break your knee shield and pass your guard.
Lack of Mobility: Staying too still in the Knee Shield position can make you easy to attack. Always be ready to move and adjust.
Defensive Strategies
Maintaining the Knee Shield
Keeping the Knee Shield position needs constant attention and adjustment. Keep your knee firmly against your opponent’s chest or shoulder, and use your frames to control their upper body. If your opponent tries to break your knee shield, use your frames to create space and get back to the position.
Reframing Techniques
Reframing means setting up your frames again when they are broken or weakened. This is very important in the Knee Shield Half Guard because your opponent will try to break your frames and pass your guard. Practice reframing techniques to make sure you can quickly and effectively set up your defensive barriers again.
Countering Common Passes
The Knee Shield Half Guard works well against many common guard passes, but it’s not perfect. Learn to recognize and counter common passes like the cross-face, switch base, and knee slice. By understanding how these passes work, you can stop them before they become a problem.
Offensive Techniques
Sweeps from Knee Shield
The Knee Shield Half Guard is not just for defense; it also offers many chances for sweeps. Some good sweeps from this position include:
Underhook Sweep: Use an underhook to off-balance your opponent and sweep them to the side.
Scissor Sweep: Use your knee shield to create leverage and sweep your opponent over your body.
Back Take Sweep: Move from the Knee Shield to the back take by using your frames and hooks to control your opponent’s movement.
Submissions from Knee Shield
Besides sweeps, the Knee Shield Half Guard offers several submission chances. Some good submissions from this position include:
Armbar: Use your frames to isolate your opponent’s arm and move to an armbar.
Triangle Choke: Use your knee shield to create space and set up a triangle choke.
Kimura: Use your frames to control your opponent’s arm and move to a Kimura lock.
Transitioning to Dominant Positions
The Knee Shield Half Guard is a great position for moving to more dominant positions. By using your frames and hooks, you can create openings to move to positions like mount, side control, or back control. Practice moving from the Knee Shield to these positions to increase your skills and effectiveness on the mat.
Training Drills and Exercises
Drills to Improve Knee Shield
To master the Knee Shield Half Guard, you need to practice regularly. Include drills that focus on keeping the position, reframing, and moving to offensive techniques. Some good drills include:
Knee Shield Retention Drill: Practice keeping the Knee Shield position while a partner tries to pass your guard.
Reframing Drill: Practice reframing techniques with a partner to improve your ability to set up frames again.
Sweep Drill: Practice different sweeps from the Knee Shield position with a partner.
Partner Drills
Partner drills are a great way to improve your Knee Shield Half Guard skills. Work with a partner to practice keeping the position, reframing, and doing sweeps and submissions. Focus on smooth and precise movements.
Solo Drills
While partner drills are important, solo drills can also help. Practice movements like hip escapes, framing, and moving to different positions. These drills will help you develop the muscle memory and coordination needed to use the Knee Shield half-guard well.
Advanced Concepts
Combining Knee Shield with Other Guards
The Knee Shield Half Guard can be combined with other guard positions to create a more versatile and effective guard game. Try moving between the Knee Shield and positions like the butterfly guard, De La Riva guard, and closed guard. This will make your guard game more dynamic and unpredictable.
Knee Shield in No-Gi vs. Gi
The Knee Shield Half Guard can be used well in both No-Gi and Gi grappling. But there are some differences to think about. In No-Gi, grips are less secure, so focus on using your frames and hooks to control your opponent. In Gi, you can use your opponent’s clothing to create extra grips and control points.
Adapting Knee Shield for MMA
The Knee Shield Half Guard can also be used in MMA. In this context, the position can be used to control your opponent and set up strikes or submissions. Focus on keeping strong frames to stop your opponent from landing strikes, and look for chances to move to dominant positions or submissions.
Case Studies and Examples
Success Stories from BJJ Competitors
Many top BJJ competitors have used the Knee Shield Half Guard successfully in competition. Study their matches to see how they keep the position, do sweeps and submissions, and move to dominant positions. Some well-known competitors who are good at the Knee Shield include Bernardo Faria and Lucas Leite.
Analysis of High-Level Matches
Watching high-level matches can give you valuable insights into using the Knee Shield Half Guard well. Look for matches where the Knee Shield is used to control and dominate the opponent. Pay attention to the details of positioning, framing, and moving.
Lessons Learned from Top Practitioners
Top practitioners of the Knee Shield half-guard often share their insights and techniques through instructional videos and seminars. Use these resources to learn from the best. Some valuable lessons include the importance of constant adjustment, the use of frames, and combining the Knee Shield with other guard positions.
FAQs
What is the Knee Shield Half Guard?
The Knee Shield Half Guard is a defensive position in Brazilian Jiu-Jitsu where you use your knee as a barrier to control your opponent’s movement.
How do I maintain the Knee Shield position?
Keep the Knee Shield position by holding your knee firmly against your opponent’s chest or shoulder and using your frames to control their upper body.
What are the best sweeps from Knee Shield?
Some good sweeps from the Knee Shield position include the underhook sweep, scissor sweep, and back take sweep.
How do I transition from Knee Shield to other positions?
Use your frames and hooks to create openings and move to positions like mount, side control, or back control.
Can I use Knee Shield in No-Gi?
Yes, the Knee Shield Half Guard can be used well in both No-Gi and Gi grappling.
How do I defend against common passes in Knee Shield?
Learn to recognize and counter common passes like the cross-face, switch base, and knee slice by understanding how they work and anticipating your opponent’s moves.
Conclusion
The Knee Shield Half Guard is a versatile and effective position in Brazilian Jiu-Jitsu that offers many defensive and offensive opportunities. By mastering the basics, practicing regularly, and learning from top practitioners, you can develop a strong and dynamic Knee Shield game. Whether you are a beginner or an advanced practitioner, the Knee Shield Half Guard is an essential tool in your BJJ arsenal.
De La Riva Guard, often called DLR, is a key move in Brazilian Jiu-Jitsu (BJJ). It started in the mid-1980s and has become a flexible and powerful tool used by fighters all over the world. Named after the famous Ricardo De La Riva, this guard is used by many world champions. This article explores the history, basics, and uses of the De La Riva Guard, offering a complete guide for martial arts fans from beginners to advanced fighters.
Introduction to the De La Riva Guard
What is the De La Riva Guard?
The De La Riva Guard is a type of open guard in Brazilian Jiu-Jitsu where you use your legs to control and move your opponent. This guard is known for one leg hooking around the opponent’s leg from the outside. This hook helps to unbalance the opponent and opens up chances for sweeps and submissions. The De La Riva Guard is not just for defense; it is a dynamic tool that allows for many attacks and transitions.
Importance in Brazilian Jiu-Jitsu
The De La Riva Guard is very important in BJJ. Its flexibility and effectiveness have made it a must-know move in both gi and no-gi competitions. By mastering this guard, you can better control and dominate your opponents, making it a key skill for anyone serious about improving in BJJ.
Historical Background
Origins of the De La Riva Guard
The De La Riva Guard started in the mid-1980s. Ricardo De La Riva, a student of the famous Carlson Gracie, began trying new ways to control and attack from the guard position. While similar moves were seen in other grappling arts like judo, De La Riva made this guard popular in BJJ.
Ricardo De La Riva: The Innovator
Ricardo De La Riva’s impact on BJJ is huge. His new approach to the guard position changed the sport and inspired many fighters to try new techniques. De La Riva’s success in competitions, including wins over top opponents, made him a legend in BJJ history.
Evolution Over the Decades
Since it began, the De La Riva Guard has kept evolving. Fighters have created many variations, each adding new elements to the move. From the Reverse De La Riva to the Berimbolo, this guard has become a starting point for some of the most advanced and creative techniques in modern BJJ.
Mechanics of the De La Riva Guard
Basic Positioning
To do the De La Riva Guard, start by lying on your back with one leg hooking around the opponent’s leg from the outside. Use the other leg to control the opponent’s hip or thigh, and grip their sleeves, collar, or belt. This position gives you a strong base to control the opponent’s movements and set up attacks.
Key Grips and Hooks
The De La Riva Guard works well if you use the right grips and hooks. The outside hook, made by wrapping your leg around the opponent’s leg, is key for keeping control and unbalancing the opponent. Gripping the opponent’s sleeves, collar, or belt gives you leverage and control, helping you to do sweeps and transitions accurately.
Common Mistakes to Avoid
The De La Riva Guard is powerful but needs to be done right to work well. Common mistakes include not keeping good grips, letting the opponent break the hook, and not keeping your hips mobile. By focusing on these key points and practicing a lot, you can avoid these mistakes and make your De La Riva Guard more effective.
Variations of the De La Riva Guard
Reverse De La Riva
The Reverse De La Riva is a variation where you hook the opponent’s leg from the inside instead of the outside. This variation offers different attack angles and can be very effective against opponents who are good at countering the traditional De La Riva Guard.
Berimbolo
The Berimbolo is a very advanced move that often starts from the De La Riva Guard. It involves inverting and rolling under the opponent to take their back or sweep them. This move is a favorite among top competitors.
Inverted De La Riva
The Inverted De La Riva involves inverting your body while keeping the De La Riva hook. This variation allows for unique attack angles and can surprise opponents. It needs a lot of flexibility and control but can be a game-changer in competitions.
Applications in Competition
Offensive Strategies
The De La Riva Guard offers many offensive strategies. From sweeps to submissions, you can use this guard to keep your opponents on the defensive. Moves like the De La Riva sweep, triangle choke, and omoplata are just a few examples of what you can do with this guard.
Defensive Maneuvers
Besides its offensive uses, the De La Riva Guard is also a strong defensive tool. By keeping control and unbalancing the opponent, you can stop their attacks and create chances to counter.
Transitioning to Other Guards
One of the best things about the De La Riva Guard is that you can easily switch to other guard positions. Whether moving to the Spider Guard, X-Guard, or Closed Guard, the De La Riva Guard gives you a flexible base for smooth transitions and continuous attacks.
Training the De La Riva Guard
Drills and Exercises
Training the De La Riva Guard needs a mix of technique drills and live sparring. Drills like the De La Riva sweep drill, grip fighting exercises, and positional sparring can help you develop the skills and muscle memory needed to do the guard well.
Sparring Tips
When sparring, focus on keeping good grips and hooks while staying mobile and adaptable. Work on switching between different variations of the De La Riva Guard and combining it with other guard techniques to keep your opponents guessing.
Conditioning for Guard Players
Conditioning is very important for training the De La Riva Guard. Core strength, flexibility, and endurance all help make this guard work better. Adding exercises like planks, leg raises, and mobility drills to your training can improve your overall performance.
Notable Practitioners
World Champions Using De La Riva
Many world champions have used the De La Riva Guard to win in competitions. Notable fighters include Marcelo Garcia, Rafael Mendes, and the Miyao brothers, all of whom have shown how effective this guard is at the highest levels of the sport.
Influential Coaches and Instructors
Besides world champions, several top coaches and instructors have helped make the De La Riva Guard popular. People like Ricardo De La Riva himself, as well as modern instructors like John Danaher and Andre Galvao, have helped spread and improve this technique.
Common Challenges and Solutions
Breaking the Guard
One common challenge is opponents breaking the De La Riva Guard. To stop this, keep strong grips and hooks while staying mobile and adjusting your position as needed. Practicing guard retention drills can also help you keep the guard.
Countering Passes
Another challenge is stopping guard passes. By using moves like the De La Riva sweep, switching to other guards, and keeping constant pressure on the opponent, you can stop pass attempts and regain control.
Maintaining Control
Keeping control in the De La Riva Guard needs good technique, timing, and adaptability. Focus on keeping your hooks and grips tight, staying aware of the opponent’s movements, and adjusting your position as needed to keep control.
Advanced Techniques
Sweeps and Submissions
Advanced fighters can try many sweeps and submissions from the De La Riva Guard. Moves like the balloon sweep, De La Riva to X-Guard transition, and various leg locks can add new elements to your game and keep your opponents on their toes.
Combining with Other Guards
Combining the De La Riva Guard with other guard techniques can create a dynamic and unpredictable game. You can switch between the De La Riva, Spider Guard, and X-Guard, among others, to create continuous attacks and keep control.
Flow Drills
Flow drills are a great way to develop smoothness and adaptability in the De La Riva Guard. By practicing sequences of moves and transitions, you can improve your ability to react to different situations and keep a continuous flow of attacks.
The Future of the De La Riva Guard
Emerging Trends
The De La Riva Guard keeps evolving, with new techniques and variations coming up regularly. Fighters are always trying new things, pushing the limits of what is possible with this guard.
Innovations in Technique
New techniques, like using lapel grips and new entries into the guard, are adding new elements to the De La Riva Guard. These innovations help keep the guard relevant and effective in modern BJJ.
Influence on Modern BJJ
The impact of the De La Riva Guard on modern BJJ is huge. It has become a basic technique that is taught and used by fighters at all levels, and its influence on the sport will continue for years to come.
FAQs
What is the De La Riva Guard?
The De La Riva Guard is a type of open guard in Brazilian Jiu-Jitsu where you use your legs to control and move your opponent, with one leg hooking around the opponent’s leg from the outside.
How do you execute a basic De La Riva Guard?
To do a basic De La Riva Guard, lie on your back with one leg hooking around the opponent’s leg from the outside, use the other leg to control the opponent’s hip or thigh, and grip their sleeves, collar, or belt.
What are the benefits of using the De La Riva Guard?
The benefits of using the De La Riva Guard include better control over the opponent, many offensive and defensive options, and the ability to switch easily to other guard positions.
Who are some notable practitioners of the De La Riva Guard?
Notable practitioners of the De La Riva Guard include Marcelo Garcia, Rafael Mendes, the Miyao brothers, and Ricardo De La Riva himself.
How can beginners start learning the De La Riva Guard?
Beginners can start learning the De La Riva Guard by practicing basic positioning, grips, and hooks, and adding drills and exercises to their training routine. Working with a good instructor can also provide valuable guidance and feedback.
What are common mistakes to avoid when using the De La Riva Guard?
Common mistakes to avoid when using the De La Riva Guard include not keeping good grips, letting the opponent break the hook, and not keeping your hips mobile. Practicing a lot and focusing on key points can help avoid these mistakes.
Conclusion
The De La Riva Guard is a powerful and flexible tool in Brazilian Jiu-Jitsu, offering many offensive and defensive options. By understanding its history, basics, and uses, you can improve your skills and effectiveness on the mat. Whether you are a beginner or an advanced fighter, mastering the De La Riva Guard can raise your game and provide a strong base for continued growth and success in BJJ.
Brazilian Jiu-Jitsu (BJJ) is a martial art that focuses on ground fighting and submission grappling. One important position in BJJ is the Spider Guard. This article will help you understand the Spider Guard and how to use it effectively. Whether you’re new to BJJ or have some experience, learning the Spider Guard can make you a better grappler.
Introduction to the Spider Guard
What is the Spider Guard?
The Spider Guard is a position in Brazilian Jiu-Jitsu where you use your feet to control your opponent’s arms while holding their sleeves. This makes it hard for them to move or attack you. The Spider Guard is very flexible and lets you do many different moves like sweeps and submissions.
History and Evolution of the Spider Guard
The Spider Guard has changed a lot over time. It started as a way to defend yourself but has become more advanced thanks to many BJJ experts. Famous fighters like Rafael Lovato Jr. have helped make the Spider Guard a key part of modern BJJ.
Fundamentals of the Spider Guard
Basic Principles
The main idea of the Spider Guard is to control your opponent’s posture and movement. By placing your feet on their arms and holding their sleeves, you stop them from moving forward or attacking. Key points include keeping your legs tight, using your grips to control their posture, and always adjusting your position.
Key Concepts and Terminology
Knowing the terms used in the Spider Guard is important. Here are some key terms:
Hooks: Where you place your feet on your opponent’s arms.
Grips: How you hold your opponent’s sleeves.
Tension: The pressure you keep with your legs to control your opponent.
Sweeps: Moves to off-balance and flip your opponent.
Submissions: Moves to make your opponent give up, like chokes and armbars.
Setting Up the Spider Guard
Grips and Hand Placement
To start the Spider Guard, you need to grip your opponent’s sleeves. This helps you control their arms and stop them from escaping. Make sure your grips are strong but not too tight, so you can move easily.
Foot Placement and Body Positioning
After gripping the sleeves, place your feet on your opponent’s arms. This stops them from moving their upper body. Your body should be at an angle, with one leg straight and the other bent. This helps you control your opponent and gives you more options for attacks.
Entries to the Spider Guard
Classic Entry Techniques
A simple way to enter the Spider Guard is from the closed guard. Grip your opponent’s sleeves, open your guard, and place your feet on their arms. This is a basic but effective way to start the Spider Guard.
Advanced Entry Techniques
For more experienced fighters, there are many ways to enter the Spider Guard. You can move from other guard positions like the De La Riva Guard or the Butterfly Guard. These advanced entries need good timing and skill.
Maintaining the Spider Guard
Common Movements
To keep the Spider Guard, you need to move a lot. Common moves include switching your legs, lifting your hips, and rolling your shoulders. These moves help you keep control and stop your opponent from passing your guard.
Retention Drills
Practice is key to keeping the Spider Guard. Retention drills help you remember the moves and react quickly. For example, you can practice with a partner who tries to pass your guard while you work on keeping the position.
Attacks from the Spider Guard
Sweeps
The Spider Guard lets you do many sweeps to flip your opponent. Common sweeps include the Balloon Sweep, the Scissor Sweep, and the Spider Sweep. These moves use your grips and leg position to off-balance your opponent.
Submissions
You can also do many submissions from the Spider Guard. Popular submissions include the Triangle Choke, the Armbar, and the Omoplata. These moves use the control you have in the Spider Guard to finish your opponent.
Defending Against the Spider Guard
Common Counters
To defend against the Spider Guard, you need good posture, pressure, and technique. Common counters include breaking your opponent’s grips, using knee slides to pass the guard, and pressure passing. Knowing these counters helps you defend and improve your guard passing.
Defensive Strategies
Good defensive strategies include keeping a strong posture, controlling your opponent’s legs, and breaking their grips. Stay calm and use precise moves to neutralize the Spider Guard and create chances to pass or attack.
Transitioning from the Spider Guard
Moving to Other Guards
The Spider Guard is very flexible and lets you move to other guard positions easily. Common transitions include moving to the De La Riva Guard, the Lasso Guard, and the X-Guard. These transitions give you more options for control and attacks.
Transitioning to Submissions
You can also move directly to submissions from the Spider Guard. Moves like the Triangle Choke and the Armbar can be done with small adjustments, making the Spider Guard a great position for finishing your opponent.
Training Tips for the Spider Guard
Drills and Exercises
To get good at the Spider Guard, practice specific drills and exercises. These drills help you learn the key moves, grips, and positions. Examples include partner drills, solo drills, and positional sparring.
Common Mistakes to Avoid
When training the Spider Guard, avoid common mistakes like using too much strength, not gripping properly, and not keeping tension in your legs. Focus on technique to make your Spider Guard more effective.
Advanced Techniques in the Spider Guard
Inverted Spider Guard
The Inverted Spider Guard is a more advanced version where you flip your body to create new angles and attacks. This move needs good flexibility and control, so it’s best for experienced fighters.
Lasso Guard Integration
Combining the Lasso Guard with the Spider Guard makes a powerful hybrid position. The Lasso Guard involves wrapping your leg around your opponent’s arm, adding more control and options for sweeps and submissions.
Spider Guard in Competition
Notable Competitors
Many top BJJ fighters use the Spider Guard in competitions. Fighters like Rafael Lovato Jr. and Braulio Estima have shown how effective the Spider Guard can be. Studying their techniques can help you improve your own game.
Competition Strategies
Using the Spider Guard in competition needs a good strategy with both offensive and defensive moves. Understand the rules, study your opponents, and make a game plan that uses the strengths of the Spider Guard.
Spider Guard for Self-Defense
Practical Applications
The Spider Guard is not just for sport BJJ; it can also be used for self-defense. The control and positioning help you neutralize an attacker and create chances to escape or submit them.
Real-World Scenarios
In real-world self-defense, the Spider Guard can help you control and subdue an attacker. By gripping strong and using your legs to control their movement, you can create openings for strikes, submissions, or escapes. Practice these scenarios to be ready for real situations.
FAQs
What is the Spider Guard?
The Spider Guard is a position in Brazilian Jiu-Jitsu where you use your feet to control your opponent’s arms while gripping their sleeves.
How do you enter the Spider Guard?
To enter the Spider Guard, start from the closed guard, grip your opponent’s sleeves, open your guard, and place your feet on their arms.
What are the best attacks from the Spider Guard?
The best attacks from the Spider Guard include sweeps like the Balloon Sweep and submissions like the Triangle Choke and Armbar.
How do you defend against the Spider Guard?
Defending against the Spider Guard involves breaking your opponent’s grips, keeping a strong posture, and using pressure-passing techniques.
Can the Spider Guard be used in No-Gi?
While the Spider Guard is mainly a gi-based position, some moves can be adapted for No-Gi grappling.
What are the common mistakes in the Spider Guard?
Common mistakes in the Spider Guard include using too much strength, not gripping properly, and not keeping tension in your legs.
Conclusion
The Spider Guard is an important and flexible position in Brazilian Jiu-Jitsu that offers many chances for control, sweeps, and submissions. By learning the key principles, moves, and strategies of the Spider Guard, you can improve your grappling skills and become a better BJJ fighter. Whether you’re training for competition or self-defense, mastering the Spider Guard is a valuable skill.
Current Brazilian Jiu Jitsu Blue Belt training under Thiago Ximenez in Scottsdale, Arizona. Over 5 Years of BJJ Experience and experience wrestling, boxing, and more!
Hey guys and girls, welcome back to Grapplers Graveyard. In today’s post, we will be covering a very simple position that you will find yourself in when training Brazilian jiu-jitsu. This position is known as the back mount.
At the end of the day, Brazilian Jiu-Jitsu is a game of body control and positioning. When you start training chances are you have no idea what your body is capable of because you’ve never tested its limits or simply were never taught how to manipulate it in ways that can make sure your opponent is uncomfortable. Back mount in theory is very simple but it is a position that is very dominant.
From this position, you are threatening attacks like a rear naked choke, bow and arrow choke, and possibly an arm bar if you continue to advance into a positon like a regular mount. We posted a video on our YouTube channel demonstrating what we will talk about in this article so if you learn better visually, check that out below!
Back Mount: BJJ Basics
The back mount in Brazilian Jiu Jitsu is a dominant position in which you (the attacker) have control of someone’s (the defender) back. Pretty simple in theory but there a lot of ways to build an entire game off of this position. The first thing you want to note is if you are planning on going the competition route, this position is rewarded 4 points when you get here and secure it.
Securing the position means having control for at least 3 seconds.
The second thing that should be noted here is that you can and should take your time advancing in this position. At the end of the day, you are the one in control when you have back mount. Hunting for submissions when the position is not secured properly can lead to an opponent’s escape and recovery to a position like a guard or in the worst case, a scramble.
Principles to Pay Attention to
Here are six principles that will be later broken down in the following paragraphs that you need to be thinking about when you find yourself in a back mount position:
Hooks
Seat Belt Grips
Legs
Ears/face Glued to Oppeonent
Submissions
Positioning, Control, Pressure, & More (Hooks, Legs, Seat Belt, Glue)
There are a lot of moving pieces here when it comes to securing the position, controlling the position, and creating pressure on your opponent but I will attempt to explain it the best way my blue belt brain can.
The BJJ back mount starts with having proper hooks and a seat belt grip across the body of your opponent. In the video breakdown, we talk about the overhook and undertook placement on the defender’s body. You really want to get this right because a skilled opponent understands that the way you place your arms can determine whether or not they can escape the comprised positon they are in or not. Be sure to not crisscross your feet in the back mount position as well. Again a skilled opponent will be able to use that against you to actually submit you with an ankle lock.
In the back mount, to create pressure on the opponent you need to glue your ear to the person’s ear on the opposite side of the overhook you have on their back. When you are keeping your head glued, imagine that you are trying to sandwich their face between your ear and your shoulder. This, combined with squeezing your arms to the chest of your opponent creates pressure and makes it easier for them to make a mistake like giving up their neck.
Escaping Back Mount
Okay, so let’s reverse this and attempt to write out the ways to escape backmount.
Finding yourself here is common but when you have your back taken, you want to keep these things in mind:
How much control does this person really have (hooks, glue, under/over hooks, etc)
Protect your neck at all times and keep your chin down (protects you from a rear naked choke)
Always try to move your shoulder to the ground on the opposite side of the overhook that they have
First things first, getting out of back mount means you have to get to the opposite side of the overhook that the opponent has on you. This traps one of their arms to the ground because it is stuck under their body and eliminates the threat of a rear naked choke (kinda).
After you get to this side, you need to peel off the bottom hooked leg and scoot your butt outside of their control. One arm should be still controlling the arms so they do not get underneath your neck and start to threaten that RNC.
Once your butt is scooted out of their control, you need to turn towards your opponent’s body. Once you do this, you have effectively escaped backmount and found yourself in side control, congrats! You just got three points in a competition for this sequence!
Attacking From Back
There are so many ways to attack from the back when you get here. Here are some attacks or progressions that I like (and have written about) that you can go over.
Getting under the neck for a rear naked choke (RNC)
Bow and Arrow Chokes
Scoot out and bail the back mount to get on top mount
Head and Arm choke (if you go for top mount)
*While going to top mount there are ways to progress to arm bars
Final Thoughts
It takes time to become efficient with the back mount. You don’t need to have many weapons when you get the back. What’s important is you understand the control mechanics that prevent opportunities to escape.
Video Breakdown:
Cameron
Current Brazilian Jiu Jitsu Blue Belt training under Thiago Ximenez in Scottsdale, Arizona. Over 5 Years of BJJ Experience and experience wrestling, boxing, and more!
This post is meant for those who are super new to the sport of Brazilian Jiu-Jitsu. I know how uncomfortable it may be to ask these types of questions in class for fear of looking bad but that is why you come here. This post is meant for those who may not get the attention they need to understand the positions they struggle with but still want to progress and get better.
BJJ Knee on Belly
The knee on the belly is one of the most common positions you will find yourself either doing or being put into. Understanding the basics of this position will be crucial to your development and progress as an athlete in this sport.
In the beginning, you may only be able to come up with a handful of attacks or progressions from knee to belly but I promise you as you train more your creativity from this spot will blossom. There is so much you can do from here it would be impossible for me to list everything. Knee of Belly is a position that is rewarded points when properly secured in a competition setting. Having a position properly secured means 1) your opponent is not moving or 2) you are holding your balance on their body for about three seconds.
Knowing how to get out of this tough spot can be a make-or-break thing for those that plan on competing.
Common Ways to Get the Position
Finding yourself in knee on belly typically happens from a scramble or when the attacker is trying to pass guard. Again, I know I find myself in this position very often so understanding the key points here is crucial for your success.
There are millions of ways to pass someone’s guard but typically when the attacker is in a standing position and it looking to advance, they will find themselves in a place to apply knee on belly to the person on the bottom.
Maintaining Control
Maintaining control of knee on belly is probably the hardest part especially when the opponent is well-versed in how to escape from the position. What I personally like to do is go for the main points of contact found on the bottom knee (from the attacker’s point of view) and the near side collar (again attacker’s point of view and only in Gi).
Here are some key points to be aware of when trying to maintain the control of this position:
Control near side collar (gi) or cup/grip near side elbow/arm/neck area
Put your body weight into your knee and drive pressure to the sternum
The leg not on your opponent should be aligned with the defender’s shoulder line
Principles You Can Focus on
Control is the number one thing to focus on
Secure the position before advancing
Watch how your opponent reacts to the pressure applied, one mistake on their end can create an opening for submissions like armbars or kimuras
Play around with different advancements of positions (side control, switch sides, mount, etc.)
How to Escape Knee on Belly
The best way I have learned how to escape knee on belly is by focusing on the knee that is in my sternum. That becomes priority number one for me to get out of the already bad position that I have found myself in.
Typically, I am doing one of these two things:
Both hands pushing on the knee and shrimping away to create space
Underhooking around their ankle area and pulling their base out from underneath them to knock them off balance, shrimping away, and pushing on their shoulder with my opposite hand to try and come up for a scramble
There are a million and one ways to play a game from knee on belly both from an attacking standpoint and a defending standpoint. I don’t think there is a “right” way to do it. Your game develops more as you test and try out new things so be sure to put on your creativity cap and put yourself in the mindset of always staying curious.
Following up on our previous article related to filling your grappling dummy, we went ahead and filled up our workout sandbags from Rogue this weekend as well. I will say, I am very impressed with the quality of the products that we bought from Rogue. We will be doing a full review in a couple of weeks and get that out for you.
The fact of the matter is, we plan on building out an entire workout area where we live and talking about it here as we go through it. Lifting weights and doing dynamic exercises with tools like sledgehammers, kettlebells, barbells, and sandbags is a must for those who are training BJJ. We understand your body is already going through enough as it is but working out is a pivotal part of the equation that keeps you from getting injured along the way.
Enough with the tangent. This post is focused on filling your sandbags. We have a video live on our YouTube Channel that can be found here:
How to Fill Your Sandbags
Filling your sandbags is super easy and over time becomes more of an art. This time around we went with two sandbags from Rogue. There are many other options that we plan on trying out that will have a different process than these bags but for the most part, they are all the same.
If you prefer to watch us fill the bags we have, please go ahead and watch that YouTube video we have above! Be sure to subscribe too.
Use Play Sand or Rubber Filler
Really there are two options to go with when filling your sandbags. Play sand or rubber filler are the two most common options on the market. Something to note is that the rubber filler you will buy is about 40% more dense than play sand. This means that 10 lbs of rubber filler will have a significantly larger volume than 10 lbs of dry play sand. Take this into account when determining the amount of fill to purchase.
Weight Training Sandbags
There are many fun workouts you can find on Instagram and YouTube for sandbag workouts that ultimately help with explosiveness and overall strength on the mats. We will start recording some of the workouts we do and put them up on our YouTube for you to enjoy!
Picking Up Sandbags for Newbs
When picking up sandbags be sure to not hinge over and pick up the weight using your back. This seems really crazy for us to even have to say but we understand everyone’s at a different point in their journey and we could respect that. To pick up heavy items like sandbags, grappling dummies, or even punching bags, be sure to squat all the way down and pick up the item using your legs.
Can you use kitty litter for sandbags?
No. This was a crazy question that we saw online that we had to include in the article but please God. Please!!!! Do not do this. The smell is making me gag just thinking about it… Play sand literally costs $5 at Lowes right now, just go get yourself some play sand instead of using cat litter as your filler.
When done properly, the arm bar is the most lethal submission out there. While it is typically a submission that is learned in the earliest days of your white belt, when perfected it can be a weapon in your arsenal that is reliable and gets you the on top of the podium when you compete.
This past weekend I had the chance to go out and compete in a local tournament. I ended up placing second losing in the finals to (you guessed it) an armbar. In this post, we will talk about how to properly execute an armbar and how you too can perfect it over time.
How to Do an Armbar
Okay, so writing down how to execute an armbar forces me to really think through the position and the key points you need to focus on when executing it. It is a challenge in itself doing this so bear with me. Throughout the post, we will have video demonstrations on how to do an armbar but for those that like to read here is a principled process:
Control: First step is getting to a dominant position to be able to pull off the armbar. This could be in guard, mount, or side control. For the purposes of this post we will discuss how to execute an armbar from the guard. It should be noted that all principles of the armbar can be replicated to various positions.
Wrist Control and Isolating Arms: Okay, from the closed guard position, you will want to get sleeve grips on your opponent. Let’s say you want to attack their right arm for this example.
Important Mechanics of the Armbar: Let’s say you secure a spot where your opponent’s arm is between your legs and you are to their side. You need to make sure that one (or both) of your legs are across their body/face to eliminate their ability to escape the armbar. When you are controlling someone’s arm, it is best to grip their wrists with both hands to secure your grip. When the wrist is controlled and the legs are properly across your opponent’s chest and face, lean back till your back in on the mats. Just leaning back will not make your opponent submit or tap out.
Pinch and Hips Up: The biggest point here is making sure you are pinching your knees together to create more tension on the elbow joint you are attacking. With the following points secured and pinched knees, you should be able to lift your hips off the ground (while keeping the opponent’s arms to your chest) to execute the armbar like it needs to be done.
Check out the following video for a detailed explanation from one of the best BJJ coaches of all time:
Perfecting the Technique: Executing the Armbar with Precision
The armbar is one of those moves that overtime can become a very pivotal part to anyone’s game. Being a high-level BJJ athlete calls for you to be able to execute simple moves like this almost to perfection. One split moment can open up the opportunity to land this submission and once you nail it down, it’s hard to get out of.
The only real advice I have for those looking to perfect this move is to go for it every time you have the chance to when rolling with your partners. After some well-spent time on the mats, you will start to see openings for pulling off an armbar that only may last a couple of seconds. Seizing those moments in a tournament can be the difference between you getting Gold and Silver.
I personally love the armbar and would say that it is a move that I am always hunting for. I specifically have an instinct for finding the moments to pull it off when my opponents are on their backs and extend their arms out to push me away. Anytime someone leaves their arms out away from their body like this is a good opening for you to shoot that armbar.
The Art of the Armbar
Here are some pointers that can help you improve your armbar:
Getting your opponent’s arm over your outside hip protects your jewels and actually helps sink in the submission faster
Flying Armbars are a thing, practice before trying to pull this off
Crossing your feet across your opponent’s head will allow for more tension on the elbow when you hip up into the elbow joint
At the end of the day, practice and time on the mats is going to make you better at pulling off the arm bar. It is a super common move that is learned really early on in your BJJ journey. Watching videos and pulling off this submission in live rolls in advanced-level classes is going to be your way at crafting your own style of play that makes you unique on the mats.
The rear naked choke is again one of the most essential moves to know and understand in BJJ. I would say that even knowing this if you don’t train should be mandatory at some level. In a self-defense situation, the rear naked choke is extremely effective and if you find yourself on the opposing end (which I hope is not the case) knowing how to defend against it could be huge. This article will aim at teaching even the people who are not trained to understand the basics, how to apply, and how to defend the rear naked choke.
Rear Naked Choke Details
The rear naked choke (RNC) happens 99% of the time when an opponent has you in a back mount position (which just means that have your back). The attacker will proceed with the goal in mind of trapping and squeezing the arteries in the defender’s neck which ultimately leads to restricted airflow. To pull this submission off the attacker has to 1) get their opponent’s neck in the crevice of their arm 2) connect the hand of this arm to the crevice of their own arm on the opposite side 3) move this opposing arm behind the opponents head finishing them off with a simple squeeze.
Here is a video explaining how to pull off the rear naked choke:
Brazilian Jiu-Jitsu’s Rear Naked Choke in 6 Steps
Take your opponent’s back
Move your arm across or under your opponent’s neck when you have established back control
Make sure your head is connected to the ear of the opponent
Connect your hand to the crevice on your opposite arm
Move this arm that you are now connected to behind your opponent’s head
Squeeze and submit
Keys To Pay Attention To (As The Attacker)
Keep Your Hooks In
Never Cross Your Ankles (You Will End up getting submitted)
Don’t Get Tunnel Vision
Most people when training BJJ who have been training for a longer time will know how to defend against an RNC. If the defender keeps their chin down or peels that arm from behind their head, there are possibilities for them to escape and slowly get their way into a dominant position. If the rear naked choke is not working out for you, go for something else. The bow and arrow choke is always a good one to shoot for if you cannot connect on this submission.
Getting yourself caught in a rear naked choke is bad news. Most of the time, you will be getting submitted from here, that is the nature of this submission but preventing this from happening is not out the picture. Key one states you will need to use your whole body to escape and you will have to address each point of contact one by one, firstly being the arm that got under your neck. The first thing here, you need to create space between your neck and your opponent’s arm, otherwise, you are toast. You can turn your head towards the crevice of their arm while keeping your chin down to prevent them from going right back to it.
Depending on the hip they have you on and how their legs are positioned, you can use your legs to break the hooks that your opponent has established. After protecting your neck this is the next priority you need to pay attention to.
You did a good job defending a rear naked choke if you find yourself in someone’s guard after their attempt. Consider that mission accomplished. Now, when you are their guard, it is time to go on the offense and time to play your game.
Escaping triangle chokes is a very important part of getting good at Brazilian jiu-jitsu. at the end of the day, you will more than likely learn this very early on in your journey but we thought it would be helpful to have something written out for those that learn this way. We have video demonstrations of this attached to this article as well as on our YouTube Channel, Grapplers Graveyard.
Triangle Choke Escape
First things first, there are principles to adhere by when it comes to getting caught in triangle chokes to begin with. Getting caught in one, when it is really sunk in, is extremely difficult. When you are in someone’s guard, the first thing to be mindful of is your hand placement. You will not get stuck in this position if you are aware of where your hands are or how you position them in the first place.
Anytime you are in a defensive position like you are when you are in someone’s guard, side control, or mount, your hand placement is crucial for you not to end up getting submitted. Your hands need to become buddies and stick together, the moment you separate the two opponents notice and can take advantage of your mishap.
Here is an excellent breakdown from Chew Jitsu on how to escape a triangle choke:
We have two of our own methods on how we escape triangles on our YouTube Channel found here:
The turtle position in Brazilian jiu-jitsu is one that is completely defensive. In this potion, the person on the bottom can be vulnerable to attacks but if done right can find easy ways to get to scrambles, into a guard, or take the match to the feet. This is a position I am super comfortable in. Both offensively and defensively, a lot of things open up with this guard. In this article, we will break down the turtle position.
What is BJJ Turtle Position
In Brazilian jiu-jitsu, the turtle position is a defensive position that looks at lot like the position in the image above. Your opponent is in a dominant position to either set up a submission or possibly take you back to score points in the realm of competition. In Turtle, you find yourself on your hands and knees with your head tucked low. Here are some key points you want to be aware of when you get here:
Key Points
Understand you have an opportunity to capitalize on people’s laziness here, you are not completely defenseless
Stay tight if you do not want people to get their hooks in and take you back. Connecting your knees to your elbows, crossing your wrists to cover your colors to protect your neck from chokes, and keeping your triceps glued to your lats will make your opponent’s time trying to break this hard and frustrating
Getting out of this position is about timing. You can get out by turning toward your opponent’s body and going for a half-guard or by standing up quickly.
Here is a video with some key movements to be aware of when finding yourself on the bottom of turtle. Typically, people will be looking for general openings when you find themselves in turtle, being aware of what they are looking to attack helps you understand what you need to do to stop or prevent them from getting what they want.
Attacking a Turtle Guard
Now this is mainly for the people who are in top position in turtle. The bottom-position practitioner’s main focus is to get out of the compromised position they have found themselves in. You, as the person on top, have the luxury of having the world at your disposal as to what you do. At the bottom of this paragraph, we have a video outlined for a great submission setup where you can both take the back and submit your opponent if done properly.
Here are your options for attacking when someone is in turtle:
What we personally like to do is start to take the back (to get points) and start looking for submissions from there. Playing with the lapel or collars and trying to go for something like a bow & arrow choke or a rear-naked choke is our go-to. Everyone’s game is going to be different and through trial and error, you will adapt your own style of play here.
The triangle choke is one of the most common submissions you will learn when you first start training in Brazilian jiu-jitsu. This submission is commonly used in both BJJ and high levels of MMA. For some, this is their favorite and go-to submission in the sport for others, it is just another tool in the toolkit. Nonetheless, understanding how to do a triangle choke is going to a fundamental that any new white belt is going to need to know how to do.
The blue belt requirements we have laid out do call for all white belt testing to be able to do a handful of submissions from closed guard. The triangle choke can be done in both gi or nogi. This is a freebie if you test and use this as one of your submissions from Guard. For those who are super green to the sport and have taken the time to Google this here is how you do a triangle choke.
How to Do a Triangle Choke
There are many variations to the triangle. To be completely honest, doing a triangle choke happens 50% of the time from closed guard or when you have an opponent in mount. I personally will not take the time to go through all the possible variations of the triangle because I would be in the grave by the time that is done.
In this post, you will find the most common ways to pull off a triangle choke. Here are 6 Key Points to successfully pulling off the triangle.
Wrist Control
Push & Pull Motion With Wrist Control
Thrust Hips Up and Wrap Legs Around
Control Position and Put Wrist In Your Pocket
Get to 90-Degrees
Complete the Submission
Pulling off a triangle is a routine that you will pick up. The best part about BJJ is the strategy that comes along with it. When you see an opening for a triangle choke it is blatantly obvious. The majority of people at the white belt stage will not be masters at this choke so getting out of a triangle is not a daunting task but as you roll with higher belts you will notice that getting into this position in the first place is horrible news.
The 6 pointers above may not be a high in-depth breakdown of each step but they give you key points to remember when trying to pull off a triangle choke. Watch the video demonstration below to get a step-by-step breakdown by our resident Black belt Keirnan.
Video Demonstration
Step By Step Breakdown
Control the opponent’s wrist
Push one wrist toward your opponent’s body and pull the other wrist up toward your head
While doing the push/pull motion, shoot your hips up and wrap your legs around the opponent’s body/neck area. [You should throw your leg on top of the shoulder on the same side you pushed the wrist]
Wrap your feet and settle control. Start to angle your calf 90° across the back of your opponent’s neck. Shinch the tightness by getting the back of your knee on top of the foot
When control is established, move the arm that you have control of [opposite of the one under your leg] to the pocket (opposite side hip)
When their arm is in your pocket control your opponent’s head and hip up
Putting this all together, the triangle choke is an essential move that you will need to know when training BJJ. There are many ways to escape this choke (which we will cover in another post). I hope you enjoyed this simple breakdown. If you are completely new to the sport, we welcome you from wherever you are in the world!
Cameron
Current Brazilian Jiu Jitsu Blue Belt training under Thiago Ximenez in Scottsdale, Arizona. Over 5 Years of BJJ Experience and experience wrestling, boxing, and more!
Table of Contents
Wrestling may be one of the oldest sports in the history of mankind, but that’s not why you should get into it, as it offers a lot more in terms of benefits.
When you get into wrestling, you realize the immense amount of value it teaches you. You learn that wrestling not only builds physical prowess but also empowers you by building mental resilience. It is an all-around sport that translates into and improves your regular life.
In 2023, the world of High School sports experienced something it had never seen before. Wrestling has made a massive move amongst schools across the nation with boys’ wrestling programs having the highest number of members ever reported in history and girls’ wrestling programs across the nation seeing this sport become the fastest-growing high school sport amongst girls (source).
Continue reading to learn all about the benefits you gain by learning to wrestle:
Why You Need To Wrestle
Wrestling is an excellent combat sport that offers many of benefits. Not only does it provide a full-body workout that builds muscles, strength, agility, and endurance, it also teaches discipline, perseverance, and the importance of good old-fashioned hard work.
The physically demanding nature of wrestling helps you develop your balance, coordination, and body awareness, which can translate to other sports and activities in a positive way. Wrestling fosters a strong sense of camaraderie and teamwork and as you train or compete you end up growing stronger bonds with those around you.
Wrestling is an individual sport that pushes you to your limits, both physically and mentally, and helps you grow as a person and an athlete. if you plan on grappling later in life, a strong base like wrestling is something that can propel you to the highest levels.
Youth Wrestling Teaches Incredible Values
High school wrestling is an amazing way to teach priceless values to young athletes. The sport goes beyond physical skills and instills excellent qualities like discipline, perseverance, and resilience. Though the training is demanding and competitive, young wrestlers learn the importance of hard work, dedication, and commitment toward their goals in the process. All to say, your kid should wrestle!
Wrestling will help the youth develop a strong work ethic and the ability to push through obstacles and challenges.
Any BODY Can Wrestle
The beauty of wrestling is that you do not need to be a specific body type to participate and progress in this sport. You can be tall, short, skinny, boy or girl, or plus-size and still excel at this sport, but only if you are willing to make the effort in the first place.
Wrestling has a variety of weight classes, regardless of your starting point, you can find aspiring athletes with the same attributes and starting position as you. Remember, anyone who enters the wrestling community is there to better themselves and should be supported.
Many wrestlers begin their journey in college with low self-confidence, however, if you make the effort and put the hours in, you can make huge progress within weeks.
Once You’ve Wrestled, Everything In Life Is Easy
Wrestling is by far one of the hardest combat sports you could enroll yourself in, and it is even harder to become a good wrestler. However, with a bit of wrestling practice, you will slowly get used to the vigorous training sessions, and you will have built unshakable confidence, powerful resilience, and praiseworthy discipline.
At this point, you will begin to realize that since you conquered such a difficult path toward success, you can conquer anything. The physical and mental health benefits you gain from wrestling translate to your daily routine. You will find that with these newfound positive attributes, you look forward to getting over obstacles and fulfilling challenges.
Ultimately, the difficulty of wrestling acts as a metaphor to help you build the tenacity required to navigate the ups and downs in life.
Mental and Physical Benefits of Wrestling
People often think Wrestling only has physical benefits, however, this is far from the truth. Wrestling improves your mental health just as much as it does your physical health. This is because, during hard training sessions, your focus and mindset will be the determining factor of if you’ll make progress or not.
Increased Strength and Endurance
It is not just about grappling and sparring with your training partners in the wrestling room, you also regularly have to hit the weights. Most wrestlers include strength training in their weekly routine a few times. They mainly do compound lifts like power cleans, snatches, and squats to help build strong bodies.
As for endurance, it is also improved greatly when you get into wrestling. Wrestling training challenges your cardiovascular endurance significantly, every training session you must perform drills, wrestle with your partner, and much more.
Overall your strength and endurance are greatly increased when you train like a wrestler.
Build Mental Toughness and Grit
Wrestling is one of the hardest combat sports. You must dedicate yourself completely to the grind for years before you can become a good wrestler. During this period, you find yourself facing many obstacles and challenges like losing competitions, getting injured or just having bad training sessions.
However, when you work hard to get over these obstacles, you find yourself stronger mentally, and ready for the next challenge. Wrestlers not only have strong bodies but also strong minds, ready to do whatever it takes and not give up.
A true wrestler understands, that there are only wins and no losses, only lessons and areas to improve on.
Build Strong Bonds and a Sense of Camaraderie
Wrestling is a team sport, when you compete, you will likely compete alongside those who trained and wrestled with you. This helps you build a strong sense of Camaraderie with those around you. Wrestling teaches you to respect your fellow athletes, training partners, and coaches.
Building good character is especially important for high school wrestlers as the values they learn in their junior year, are the values they will stick to in the long run. The younger someone gets into wrestling, the better.
Increased Level of Confidence
One of the biggest benefits of getting into wrestling is the improvement in self-esteem. You walk with better posture, you speak clearly and do not shy away from problems. When you train and get better at a combat sport, you become stronger physically, mentally, and spiritually and more confident in your daily routine.
Every BJJ Practitioner We Know [TODAY] Wished They Wrestled
Many of the Brazilian Jiu-Jitsu practitioners we know today express a strong desire that they had gotten into wrestling earlier in their journey. This is because wrestling provides a solid foundation of grappling skills, takedowns, and control that seamlessly complements BJJ skills and techniques.
It’s a common opinion among BJJ athletes that wrestling experience would have greatly enhanced their overall grappling abilities.
Frequently Asked Questions
Is Wrestling Gay?
Wrestling has nothing to do with one’s sexuality. You can become an excellent wrestler whether you are straight or homosexual. Wrestling teaches athletes to respect and protect one another, embrace sportsmanship, and create strong bonds. If your son plans on going into combat sports, getting to high levels in football, or is just a bigger kid, wrestling is ideal for them. They should not be shamed into not doing a sport they want to give a go.
Can [or should] my daughter wrestle?
Your daughter should definitely get into wrestling if they choose to do so. It is an amazing combat sport that has seen more female attention than ever in the world in the past decade. Nowadays, more and more women are training to become elite wrestlers, and have hopes of building a career in it.
If your daughter is interested in the sport, you should enroll her in a wrestling gym with experienced coaches.
How likely is it that you get cauliflower ear… really?
Cauliflower ear isn’t as common as most people think. To get it, you must train extremely hard, in an unsafe manner.
It usually occurs when your ear repeatedly gets hit or comes into contact with the mats. However, it can easily be avoided by training in a clean and safe gym, and if you’re a beginner, you can wear headgear as well.
Why is wrestling such a great sport for character-building?
Wrestling is an amazing sport for character building for two main reasons. The first is that through vigorous training, you build a strong and respectable physique, which can help you in other sports or just your daily routine.
The second is that wrestling teaches you the value of hard work, discipline, and commitment. In wrestling, skills are not something you can buy or inherit, you must work for it. It takes years of dedication to become a good wrestler.
The hard work and effort it takes to become a wrestler is what builds your character.
Table of Contents
Wrestlers have always enjoyed prominence in MMA from the early days of the UFC. Legends such as Randy Couture, Matt Hughes, GSP, Jon Jones, Daniel Cormier, and Khabib Nurmagomedov are a few of the many MMA fighters with a wrestling background who have won and sat at the top of the UFC in their respective weight classes.
Today, the Dagestanis have taken the UFC by storm. The likes of Islam Makhachev, Usman and Umar Nurmagomedov, and Khamzat Chimaev, aside from having exceptional MMA records, have one more thing in common: Their game mainly consists of groundwork and wrestling.
Fans all over the world have come to realize that wrestlers dominate the UFC. In the octagon, it is considered to be more useful than any other martial arts or combat sport. Here’s why wrestlers are considered superior in MMA:
Understanding of the MMA Point System
Better Physical Conditioning
Tougher Training Routine
Continue reading to learn all about how wrestlers are considered superior in MMA.
Why Wrestling is Important For MMA Fighters
In the world of Mixed Martial Arts, there are a number of reasons why wrestling is important for fighters. For starters, wrestling provides a strong foundation which most fighters can (and will) build upon. It helps you control your opponent through takedowns, ground control and creates a whole new way of thinking for the individual who starts to embody the mind of a wrestler. if you have ever rolled against a wrestler, you know exactly what I am talking about.
Outside of these three facts, wrestling also teaches you how to counter takedowns and how to get out of difficult positions like submission holds. Furthermore, when wrestlers transition into the UFC, they are physically stronger, more explosive, and have better endurance due to their extreme training.
MMA’s Rules and Scoring System Favor Wrestling
MMA definitely favors wrestling more, as it is easier for a good wrestler to get more points than it is for a good striker.
This is because in MMA, takedowns and ground control are highly valued, they help you score points quicker with the judges. Since wrestlers excel in these areas, they are able to control their opponents on the ground with ease, lay effective strikes, or put them into submissions, they score points quicker.
Additionally, advanced wrestling techniques like clinching and cage control are also crucial for wrestlers to dictate the flow of the fight. These fighting styles help nullify your opponent’s striking skills earlier in the fight.
Amateur wrestlers and BJJ fighters both include leverages as a key part of their wrestling backgrounds. Those who begin at a young age often describe their initial training as pure hell. This is because it is highly demanding, both physically and mentally. It requires not just muscular endurance but also cardiovascular endurance.
In a wrestling class, there are a variety of workouts performed like drills, sparring, and conditioning exercises that push their bodies to their limits. Through these workouts, unmatched strength, explosive power, agility, and endurance is built. Combined with a striking combat sport like kickboxing or Muay Thai, athletes become a force to be reckoned with in the octagon.
Wrestlers Have a Tough Training Routine and are Used to Competing
Wrestlers are known for their incredibly tough training routines. They are used to spending long hours on the mat, perfecting their techniques and skills. They regularly push their bodies to their limits striving to improve their strength, explosiveness, and endurance.
They are also known to have a lot of experience competing. It is common for MMA fighters to go long months without fights, this is not the case for even the average BJJ fighter or wrestler. Wrestling competitions happen regularly and wrestlers can expect to participate in several tournaments every year.
Why Wrestlers are Dominating in MMA
Over the past decade or so, Wrestlers have been dominating the MMA game, whether it’s the UFC or ONE. Their effective grappling skills help them get their opponents from the standing position to the ground in seconds.
Wrestling techniques like single and double-leg takedowns are amazing against fighters with excellent striking skills but not good grappling skills.
Wrestlers Determine Where the Fight will Take Place
Wrestlers and BJJ athletes have a significant advantage in Mixed Martial Arts because they can dictate where the fight will take place. They use their exceptional takedown skills and ground control to determine the pace and positioning of the fight.
Brazilian Jiu-Jitsu fighters can choose to keep the fight standing or take it to the ground, after analyzing their opponent’s strengths and weaknesses. This strategic advantage allows them to exploit their grappling skills and neutralize their opponents’ striking abilities in whatever Martial art they excel in.
By utilizing their wrestling and BJJ techniques, such as grappling, clinching, and cage control, wrestlers can effectively control the fight and limit their opponents’ options.
Can Wrestling be used in self-defense situations?
Wrestling training and techniques can definitely help you in the real world. Skills such as takedowns, control holds and escapes can all be beneficial in a real fight. Wrestling also helps build confidence and discipline, which is again, very important for any physical confrontation.
However, what you must understand, is that a street fight has no rules like there are on the mats or in the octagon. This is where wrestling can lose its charm, as in a real fight, you can get punched, kicked, elbowed, or even bitten. You can even get a weapon pulled on you.
This is why it is best to avoid any sort of physical confrontation or argument with a stranger. However, if need be, it would be better for you to know a bit of kickboxing as it is also a highly competitive sport that compliments wrestling well.
As an aspiring MMA fighter or just someone who wants to be able to protect themselves, it is better to know multiple combat sports.
A Wrestler Will Always Find a Way
A wrestler’s biggest strength is his ability to always find a way out, regardless of the position he is in. They are known for their excellent agility and even better flexibility which helps them turn the tables no matter how bad of a position or submission they are in.
They possess a unique set of skills and attributes that make them feared opponents in an MMA fight. Their unmatched and relentless work ethic, mental toughness, and disciplined training routine allows them to adapt and overcome any challenges they face against MMA fighters.
Whether it’s using their powerful takedowns to control the fight, utilizing their grappling masterclass to secure submissions, or employing their superior conditioning and endurance to outlast their opponents. Wrestlers have a champion mindset and an equipped toolkit that gives them an edge, mixed with a striking sport like Muay Thai and they become unstoppable.
Wrestling Allows You to Quickly Learn BJJ
Wrestling training provides an excellent foundation that allows you to quickly excel at Brazilian Jiu-Jitsu. The skills and techniques you develop as a wrestler, such as takedowns, control, and ground positioning, seamlessly translate into your BJJ game.
Good wrestlers already have an efficient and effective understanding of body mechanics, leverage, and weight distribution, all of which are crucial aspects of BJJ. The ability to control your opponent and maintain dominant positions gives you a head start in learning the intricacies of BJJ submissions and grappling transitions.
It is essentially a given, that if you can become a good wrestler, you can become a good BJJ fighter, this is because in the octagon, they compliment each other well.
The off-season is the perfect time to work on developing insane levels of strength, power, speed, and conditioning so you can ragdoll opponents come the season.
We earn a commission if you make a purchase, at no additional cost to you.
Cameron
Current Brazilian Jiu Jitsu Blue Belt training under Thiago Ximenez in Scottsdale, Arizona. Over 5 Years of BJJ Experience and experience wrestling, boxing, and more!
Table of Contents
A balanced diet is the fuel of your Brazilian jiu-jitsu training regardless of your weight class. Without the right fuel, your performance will be highly compromised. Without the ideal diet plan consisting of the essential amino acids and the right nutrients, you will not progress as efficiently.
Continue reading to learn all about the right pre and post-workout meals you should have, to maximize your gains.
What You Eat Before and After Brazilian Jiu-Jitsu Matters
When it comes to a good diet, as a competitive athlete, you must understand that some specific foods and meals are better as a pre-workout, and there are foods and meals better as a post-workout, all while getting enough calories to maintain weight. This is also exceptionally important when cutting weight for your fights.
As a Brazilian Jiu-Jitsu athlete, your eating habits can significantly affect your training performance and recovery. It is essential to provide the best diet for your body with the right nutrients and macronutrients. Aiming for a balanced diet that is nutritious and high in protein should be a priority for all BJJ athletes.
Around 45 minutes to an hour before your training session, you should have a pre-workout meal that is high in carbs and protein and full of vitamins. The carbohydrates will help you remain energized throughout your workout, and the protein will facilitate muscle mass growth and recovery.
As for the post-workout meal, your body will need fuel to replenish the energy and promote recovery. This meal should also be rich in carbohydrates and protein, avoid processed foods as they are filled with harmful preservatives.
What to Eat Before Jiu-Jitsu Competitions
Before stepping onto the mats or ring depending on your combat sports, you must ensure that you have some form of fuel that will improve your performance. overall health However, you should make sure that what you consume offers a variety of health benefits.
The food you eat should be light on your digestive system, this is so you do not feel bloated and have more energy in competition. Avoid complex carbs like whole grain pasta, whole grain bread, and brown rice. These foods digest and release energy slowly, in competition, you want quick energy.
Before competitions, athletes need to eat something light that gives them enough energy beforehand. Consider the following items before you step onto the mats:
Avoid complex carbohydrates, protein and energy bars are recommended
Lean meats like chicken breast and baked salmon for your protein intake
Sweet fruits like bananas and melons (fast-digesting carbohydrates)
Honey
What to Eat Before Jiu-Jitsu Training Sessions
Deciding what to eat before your training sessions is not a complex process for most athletes, you just need to get the essential nutrients in to ensure proper digestion.
Some examples of good pre-workout meals are:
Grilled chicken breast with quinoa and steamed vegetables
Whole wheat pasta with marinara sauce and lean ground turkey
Oatmeal topped with mixed berries and a side of Greek yogurt
What Should You Eat After Training Sessions or a BJJ Competition?
After training, your body requires different foods to help prioritize recovery and muscle building. These are different diets compared to what diet you need before training. For an extra helping hand, it is recommended you look into the Gracie diet by the Gracie family, specifically, Carlos Gracie Jr.
After Training:
Baked salmon with roasted vegetables and quinoa
Whey protein smoothie with Greek yogurt and fruits
Whole grain wrap with lean turkey, avocado, and veggies
After Competitions:
Grilled chicken with sweet potato and steamed greens
Brown rice with lean protein (beef or tofu)
High protein salad with mixed greens, grilled chicken, boiled eggs and veggies
Gonna be longer than 2 hours before you can eat?
have a protein shake or a protein bar to hold you over
get some quick carbs in your system
Pre-Workout Meal Ideas That Won’t Make You Feel Sick or Bloated
2 Bananas with a tablespoon of peanut butter
Greek yogurt with a handful of berries (raspberries, strawberries and blueberries)
Rice cakes with a thin spread of avocado and a sprinkle of sea salt
Hydrate, Hydrate, Hydrate!!!
Hydration is key. As a combat athlete, you are likely to sweat excessively during long periods of your workouts because of the physically demanding nature of Jiu-Jitsu. This is why you must constantly hydrate yourself in between sets and rounds, a sip of water every few minutes will do you well.
For the average adult, it is recommended to drink at least 8 glasses or 2 liters of water throughout the day. For Jiu-jitsu fighters, this is just the minimum. It is important to drink at least 4-5 glasses of water throughout a one-hour workout. You can also use sports drinks during your training which are high in electrolytes.
If the human body is dehydrated during training, it can face a variety of issues. These can include:
Headaches
Nausea/dizziness
Weakness
Bodily Pains
Importance of Sleep In This Equation
It is common for a beginner BJJ athlete to fail to realize the importance of sleep and recovery. Beginner and novice Jiu-Jitsu fighters think they have to train hard every day. The reality is, that even if you have a perfect diet plan and train hard regularly(strength training and sparring), but do not prioritize getting quality sleep, you are leaving a significant amount of gains on the table.
It is not just your muscles that require rest, but also your mental health and central nervous system. This is because Jiu-Jitsu is just as mentally hard as physically hard. This is where recovery comes in.
For a healthy athlete, it is recommended most athletes to get a minimum of 8 hours of uninterrupted and high-quality sleep for adequate recovery. If you have issues sleeping well, there are a few things you can do to improve the quality of your sleep:


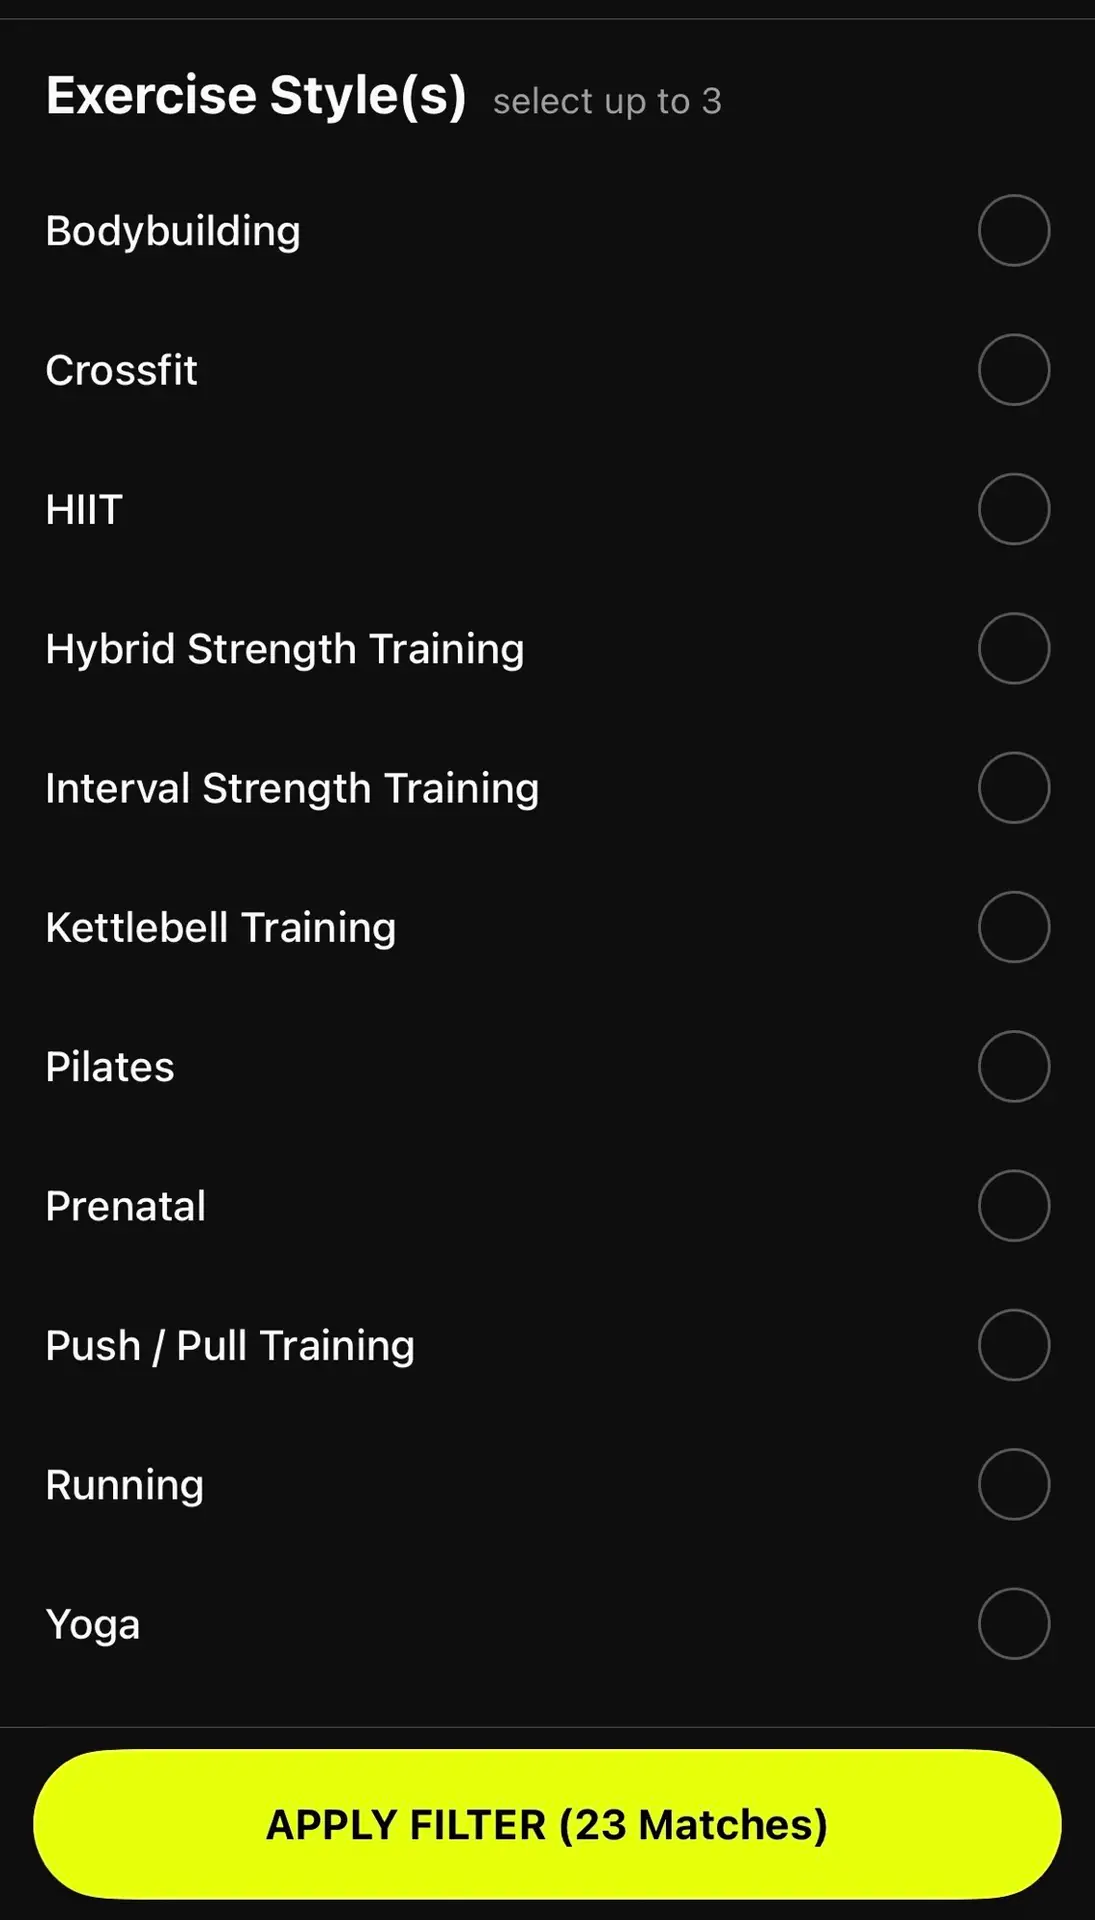
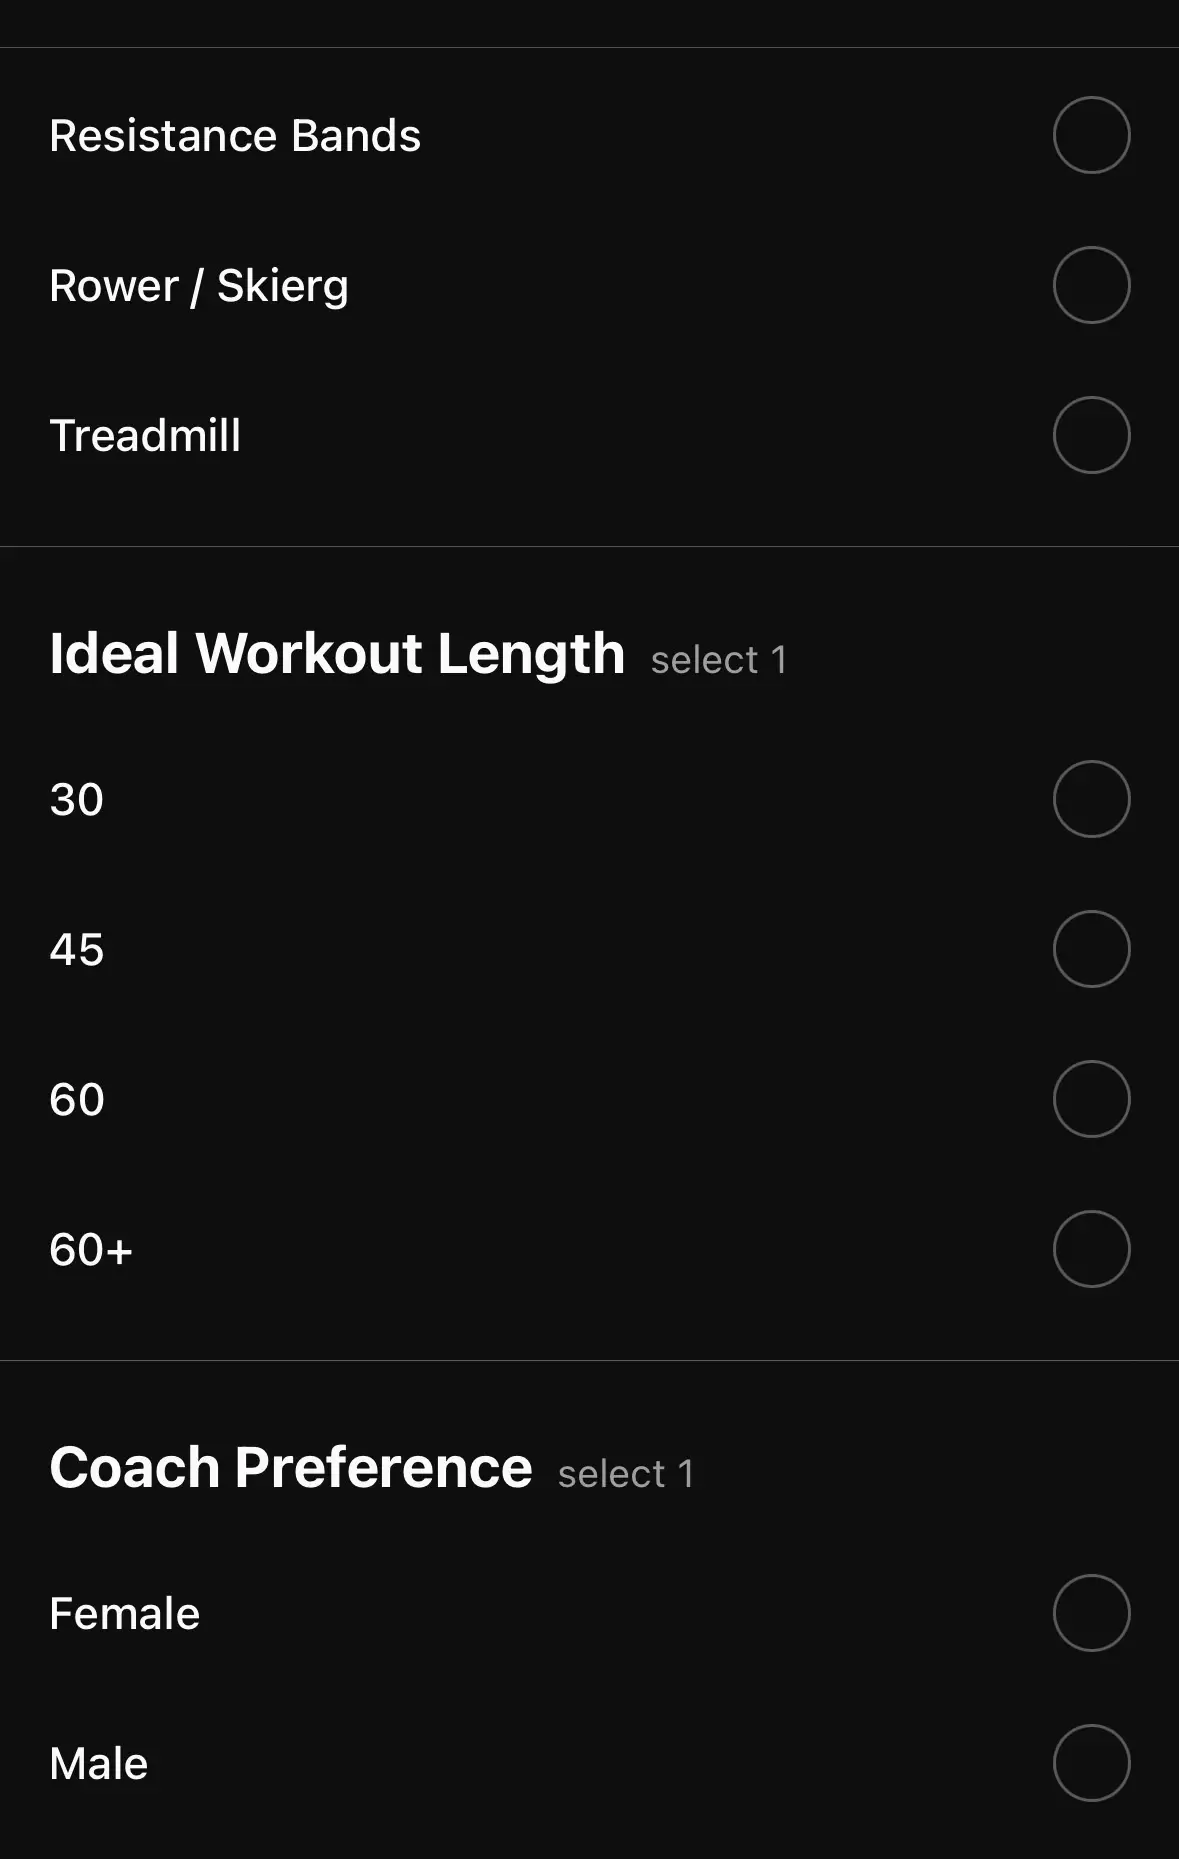


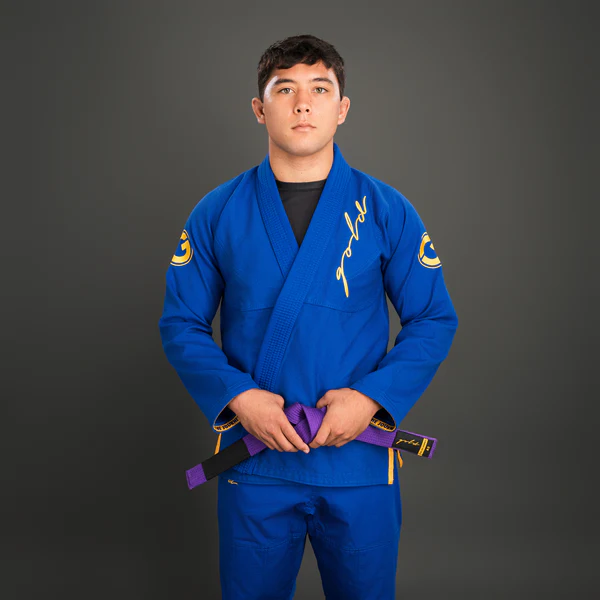
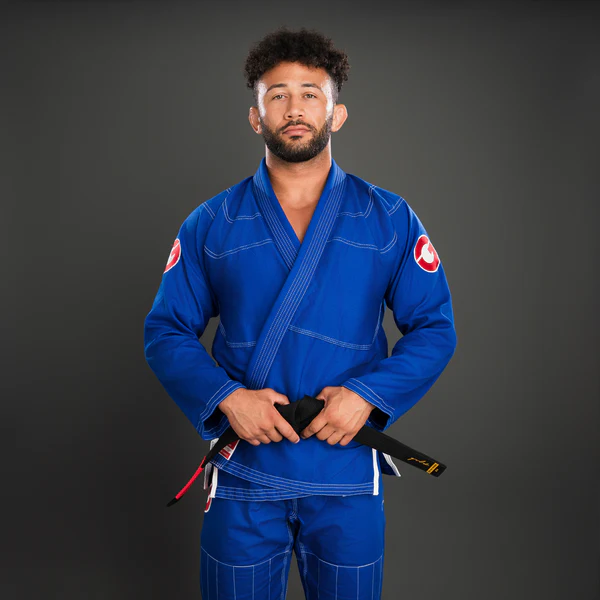
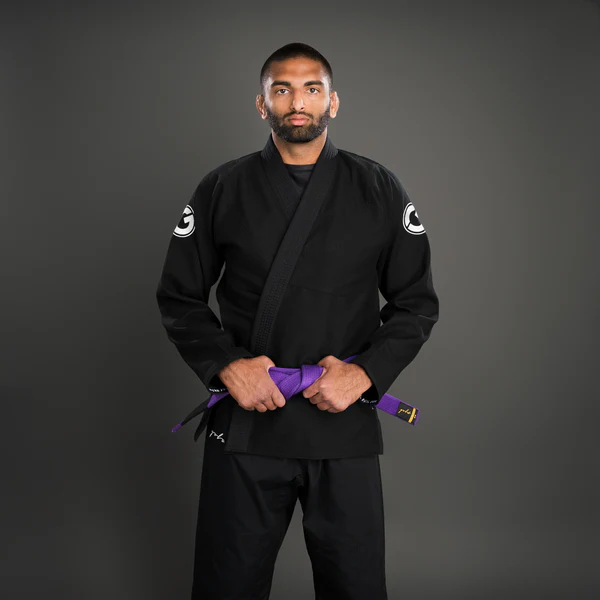
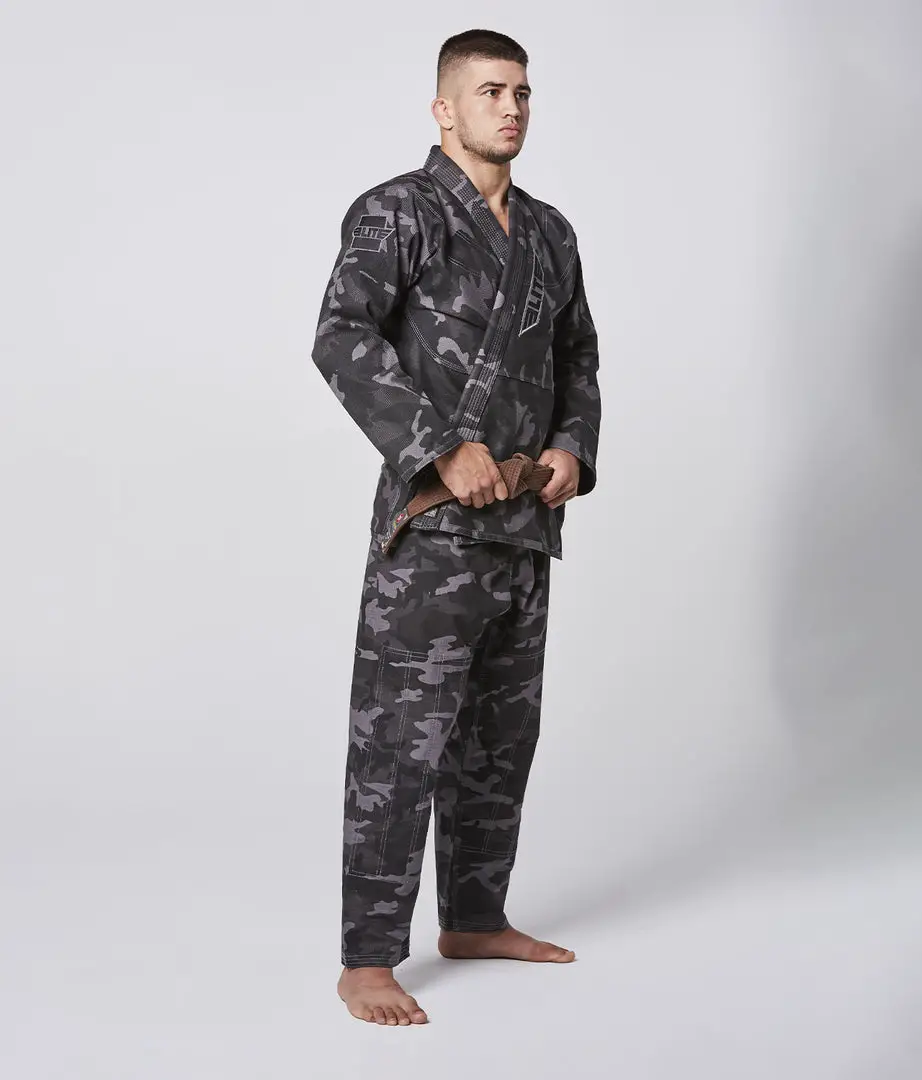
 Batch High-Energy Work to Master Work-Life Balance
 Boxing Transforms Stress into Professional Strength
 Schedule Combat Training Like Business Meetings
 Energy Management Trumps Time in Sport-Career Balance
 Treat Boxing as Medicine, Not Hobby
 Protect Training Time to Build Career Discipline